Women in Tech: Introduction to Linux on Azure
This workshop has been a collaboration between Researc/hers Code and Microsoft. Researc/hers Code supports women in tech and academia by running skills workshops and podcasting the talent of women in tech and research. To find out more about this story: https://twitter.com/VictoriaCarr_/status/1098488439081783302 and follow @ResearcHersCode, @AmyKateNicho and @VictoriaCarr_
Check out the GitHub Pages view here: https://amynic.github.io/intro-to-linux-on-azure/

Useful Links
- Workshop slides for Introduction to Linux with Azure 18/02/19
- Linux on Azure Documentation
- Linux commands
- Azure Batch Documentation
Introduction
To start this workshop, we will create a Linux Ubuntu Virtual machine (VM) using Microsoft Azure. As this VM will be hosted in the cloud, we will walk through creating ssh keys using the Azure Shell Environment, creating an Ubuntu VM image and connecting to the machine once created
Pre-requisites
- Have access to a Microsoft Azure Subscription, get it free for 12 months here: https://azure.microsoft.com/en-gb/free
- Have access to a modern web browser (content tested using Edge and Chrome) Getting Setup
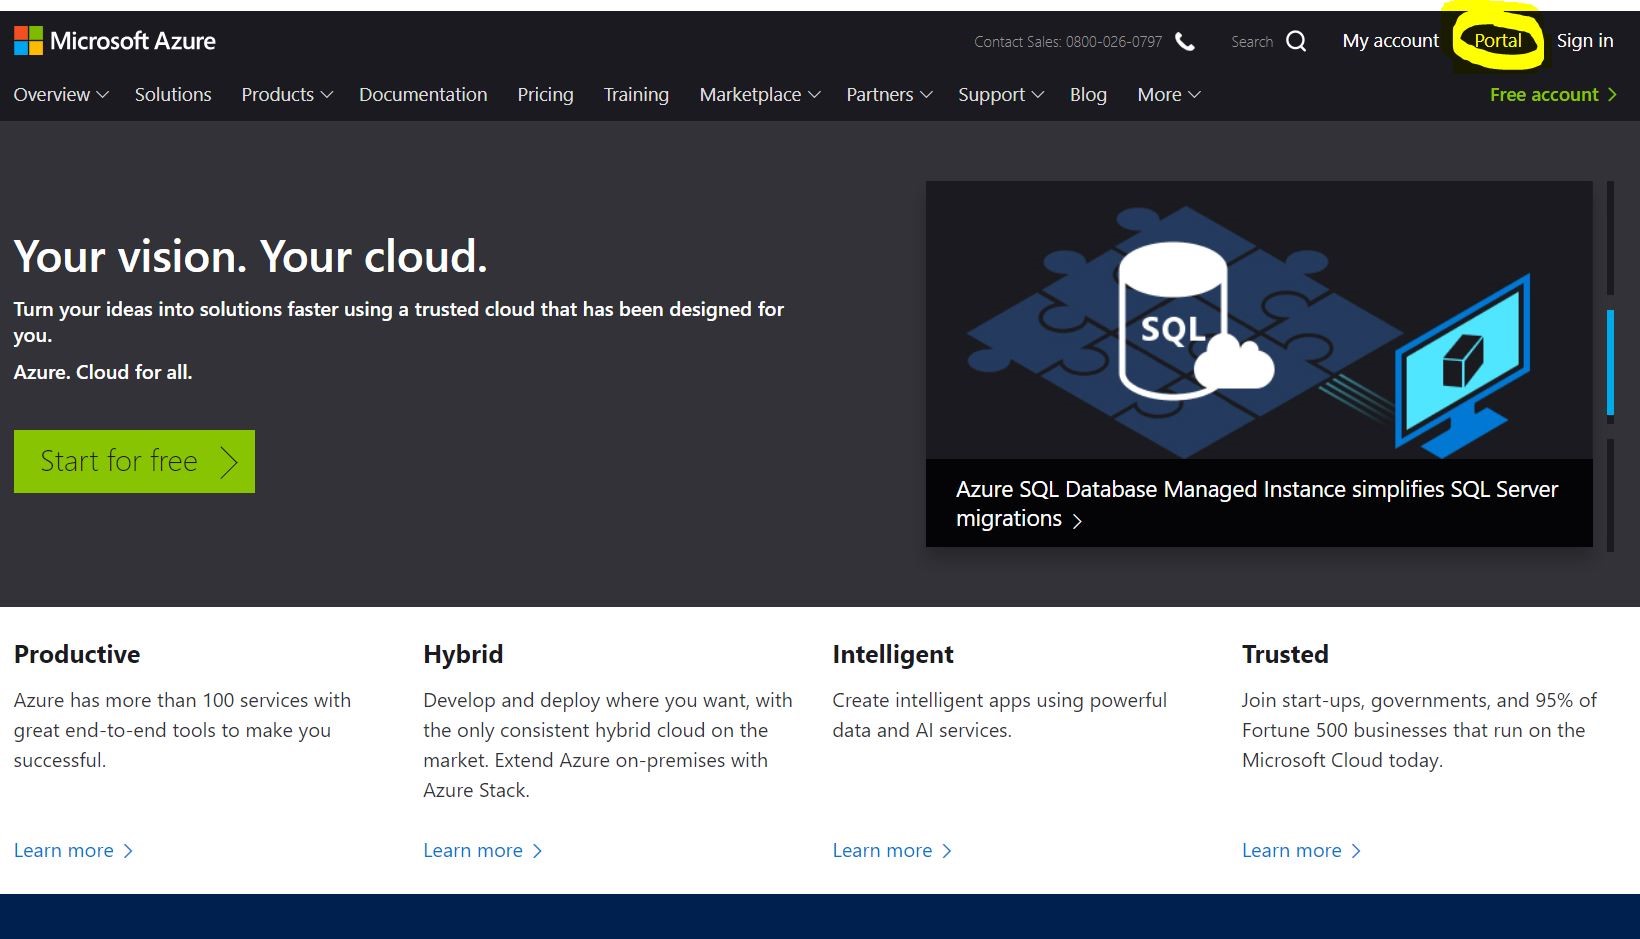
Go to https://azure.microsoft.com/ and sign in to the Azure Portal in the top right corner using the email and password you created whilst redeeming the azure pass voucher code.
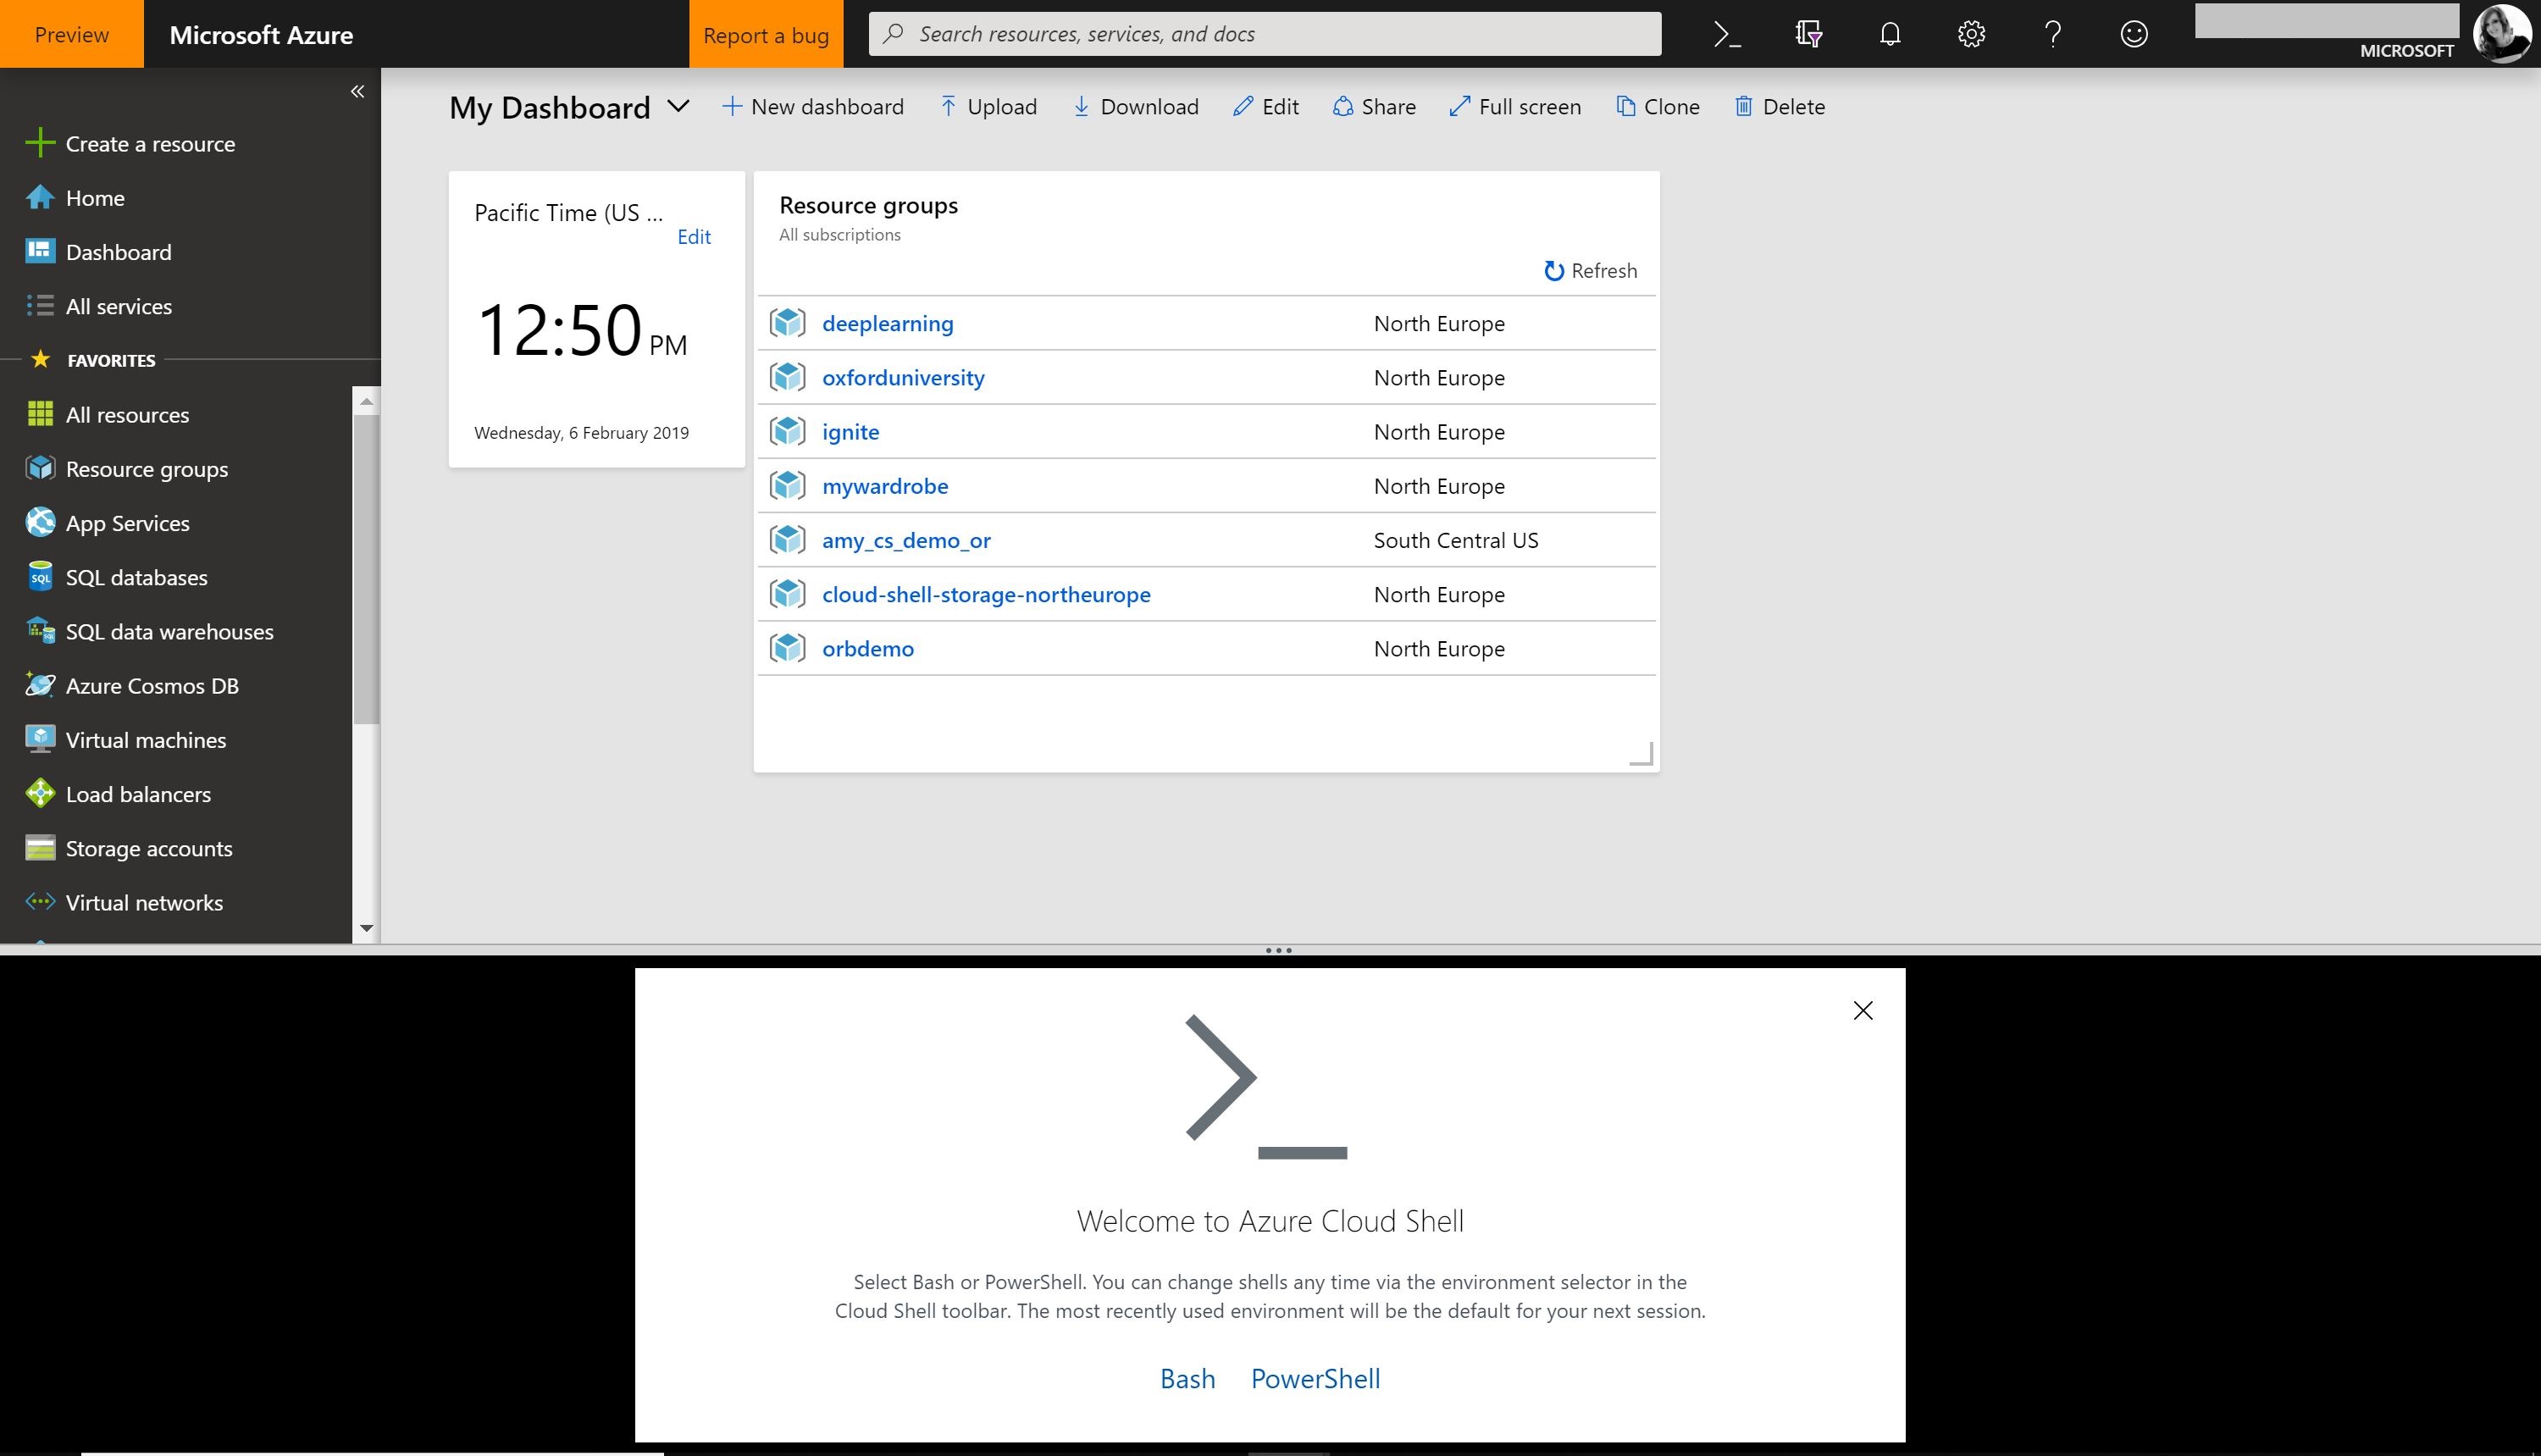
Now you will enter the Azure Portal Homepage. In the top toolbar by the search box you will see the Azure Shell button (highlighted below) – click this button to open the Azure Shell in the web browser. Once open select ‘Bash’
We are now going to create the ssh keys we need to access a Linux machine securely. We can create these keys using the Azure Shell (they will also be stored in your Azure Storage Account).
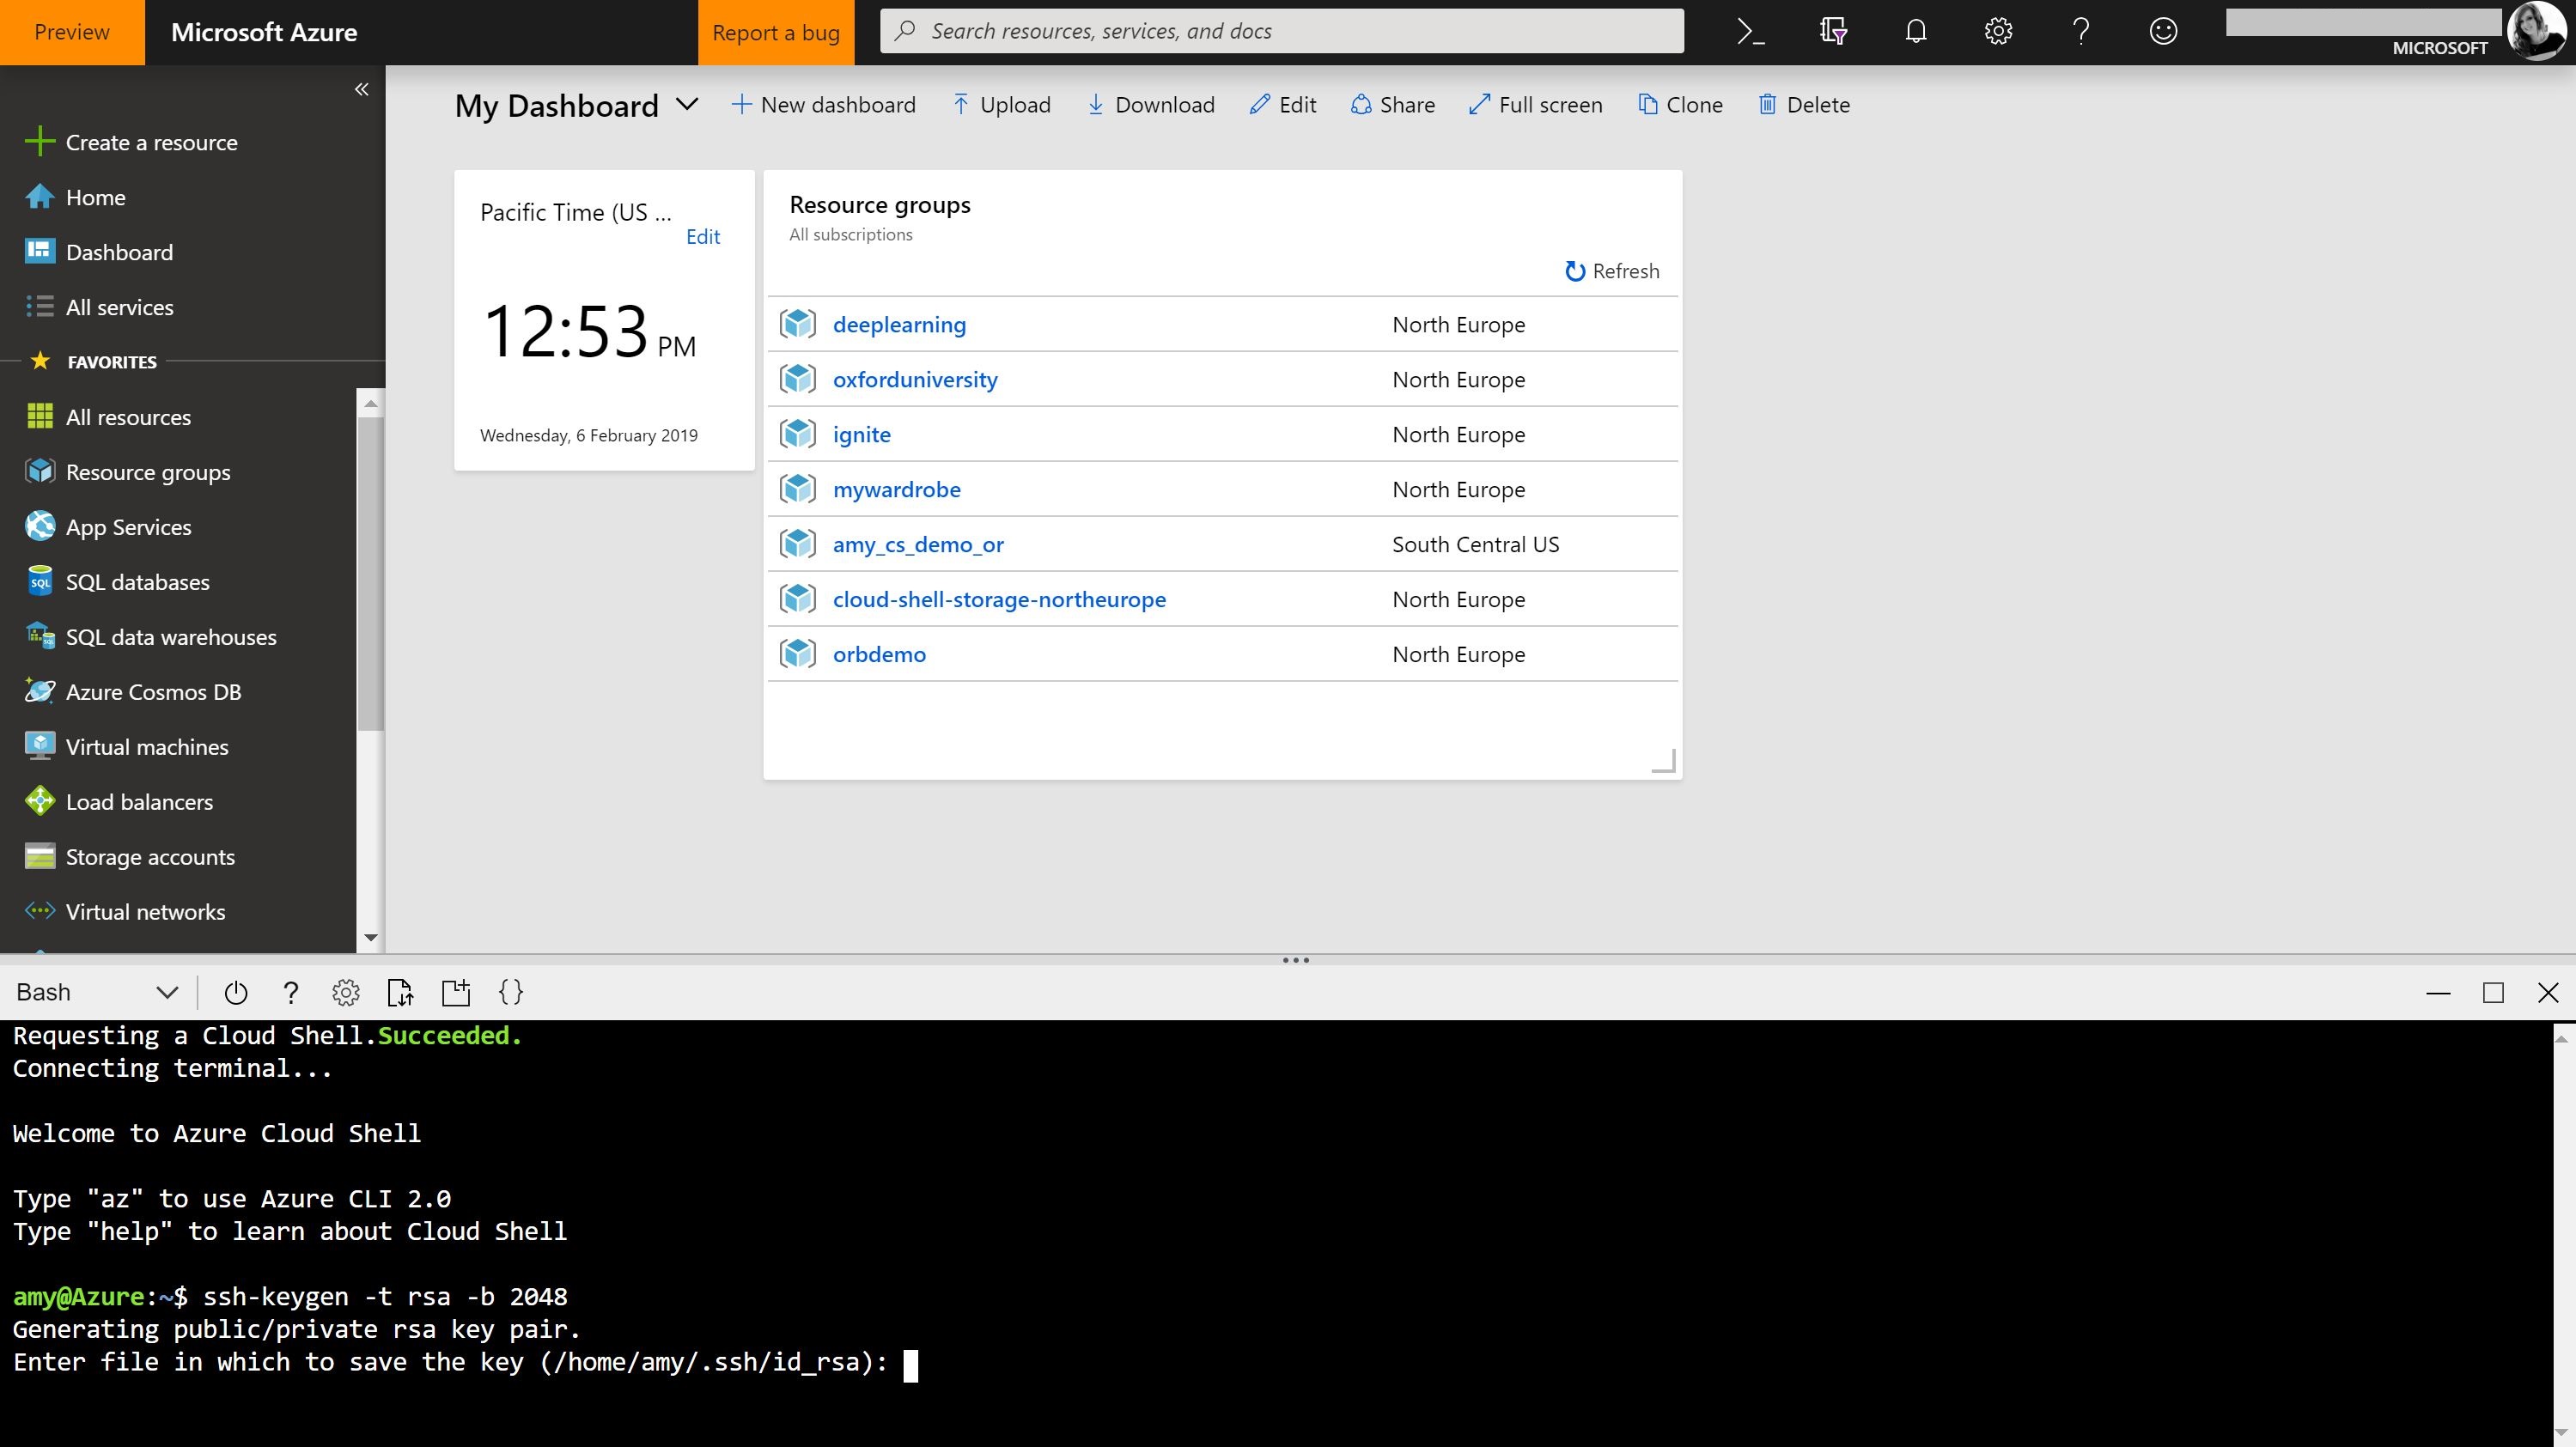
Enter the command:
ssh-keygen -t rsa -b 2048
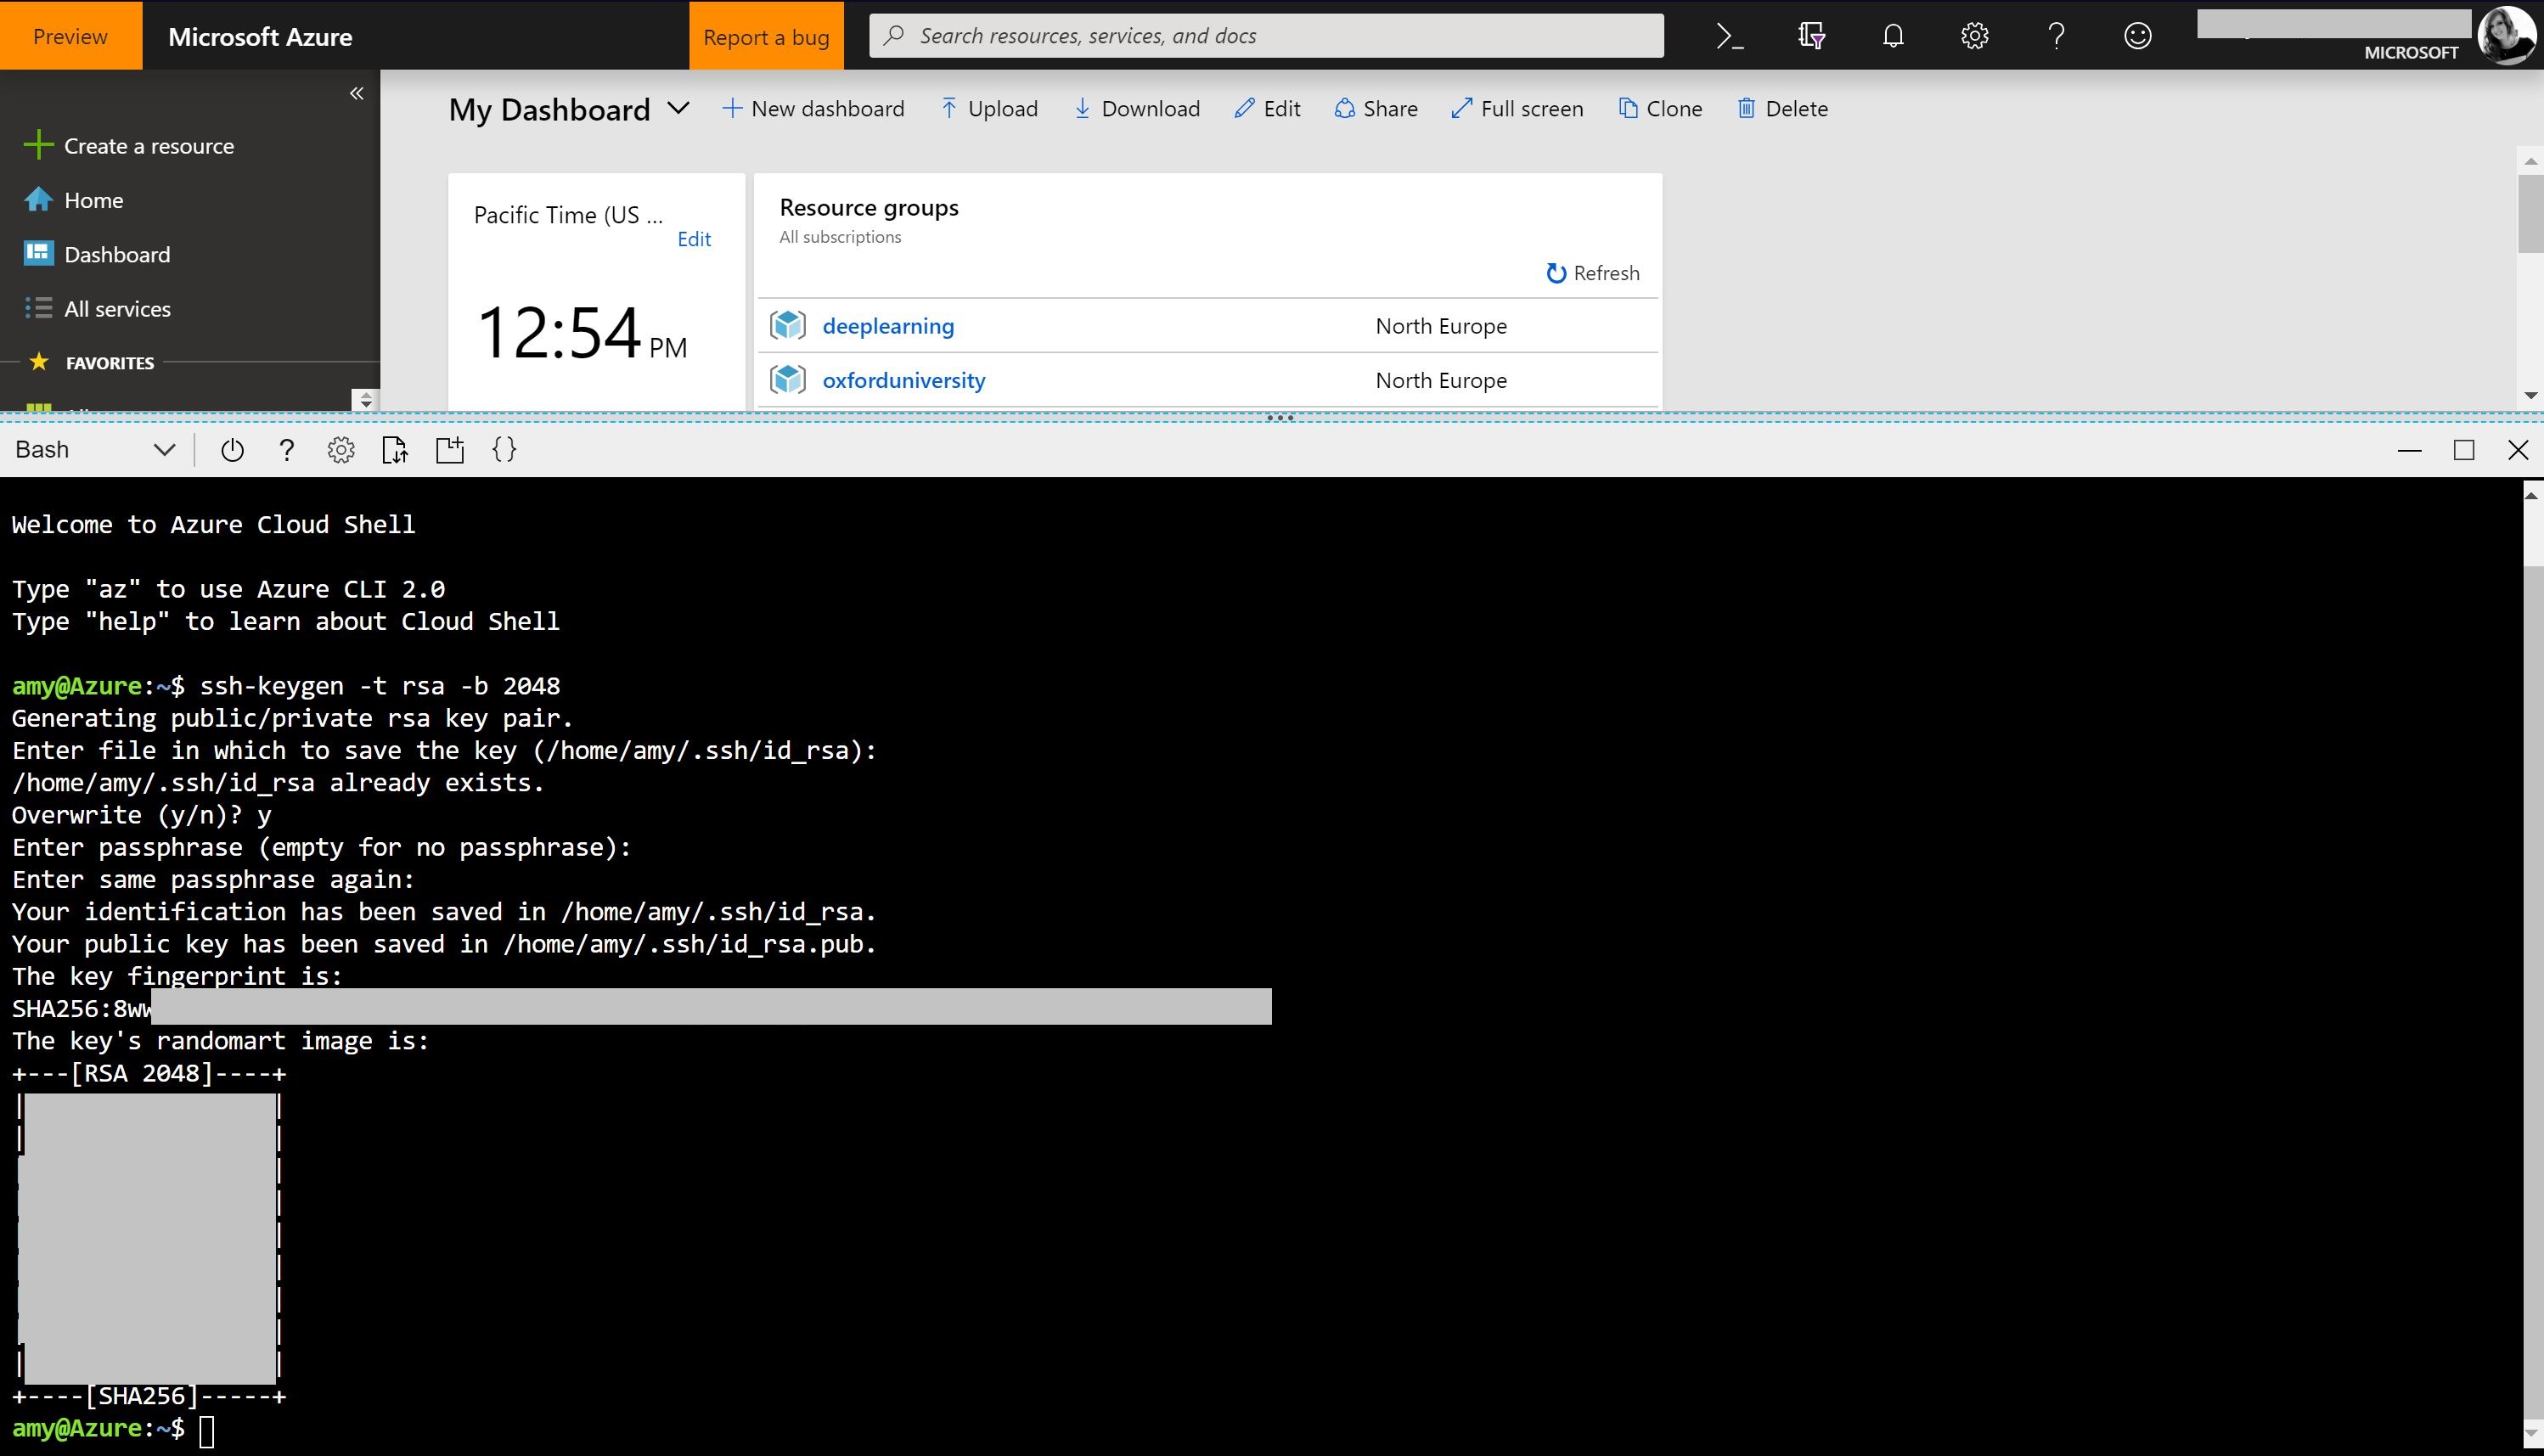
Keep the default storage location of the key to /home/<username>/.ssh/id_rsa by hitting enter
We do not want to create a passphrase for this key, so hit enter again.
To retrieve your key enter the command:
cat ~/.ssh/id_rsa.pub
Now you will see your ssh key, copy this long value, you will need this later
Close the Azure shell using the small x in the top right of the shell window to view the Azure portal in full screen
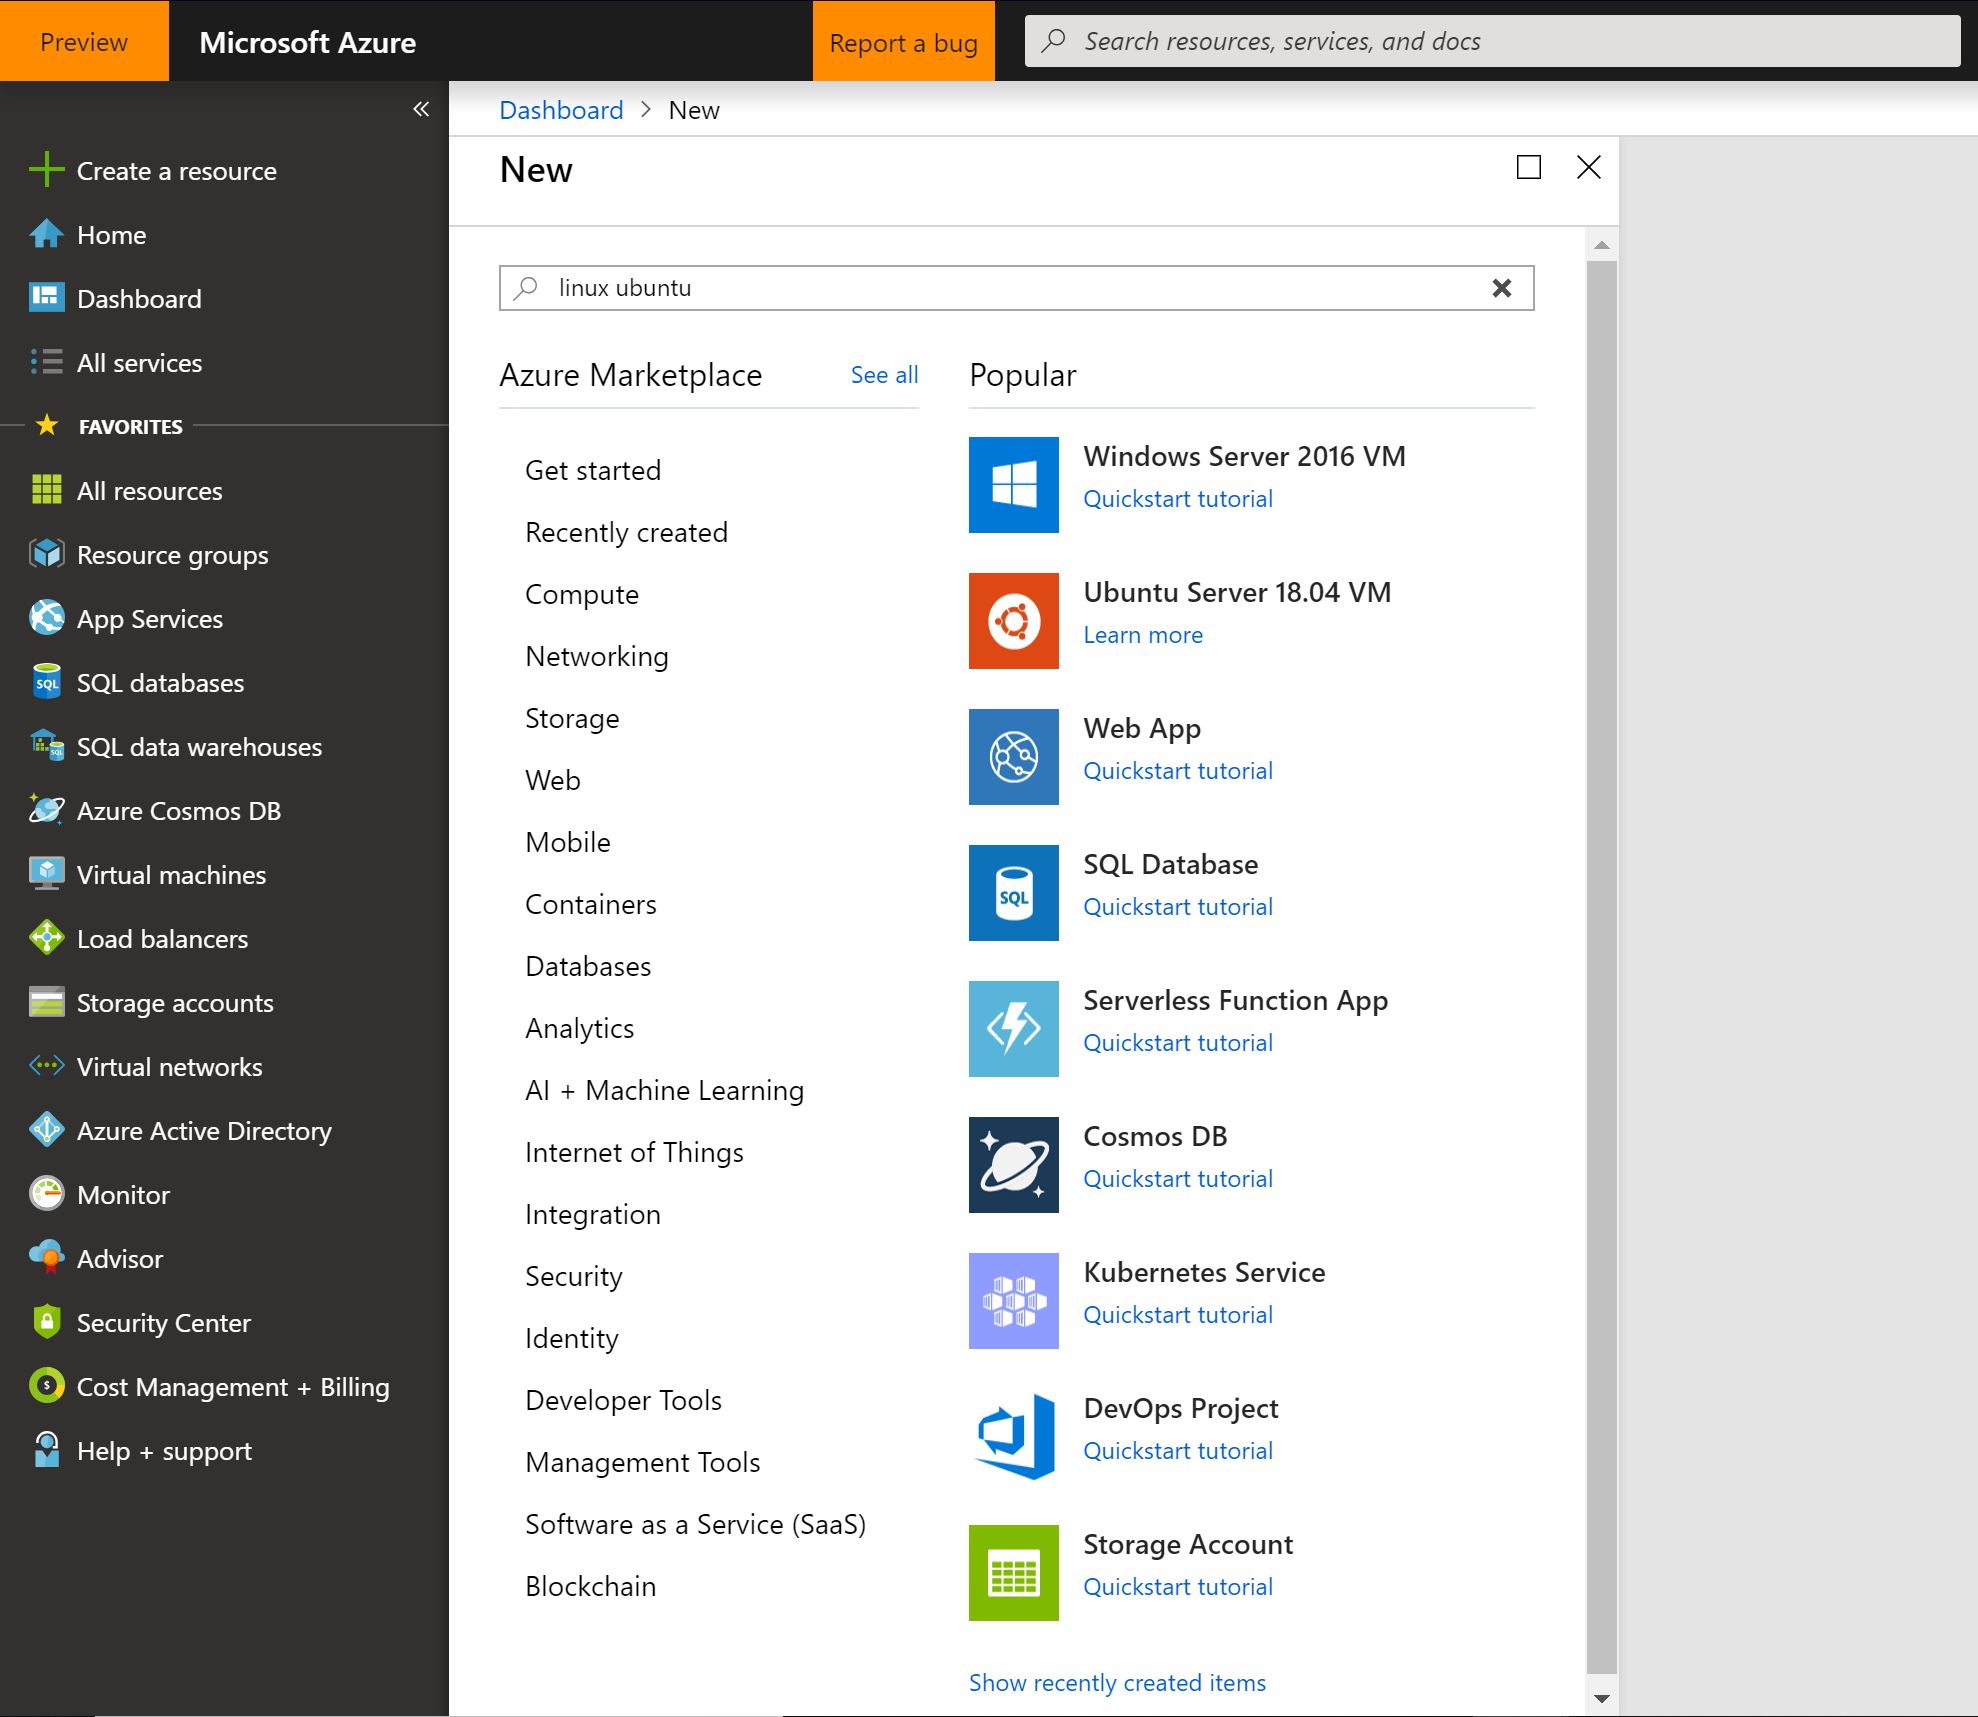
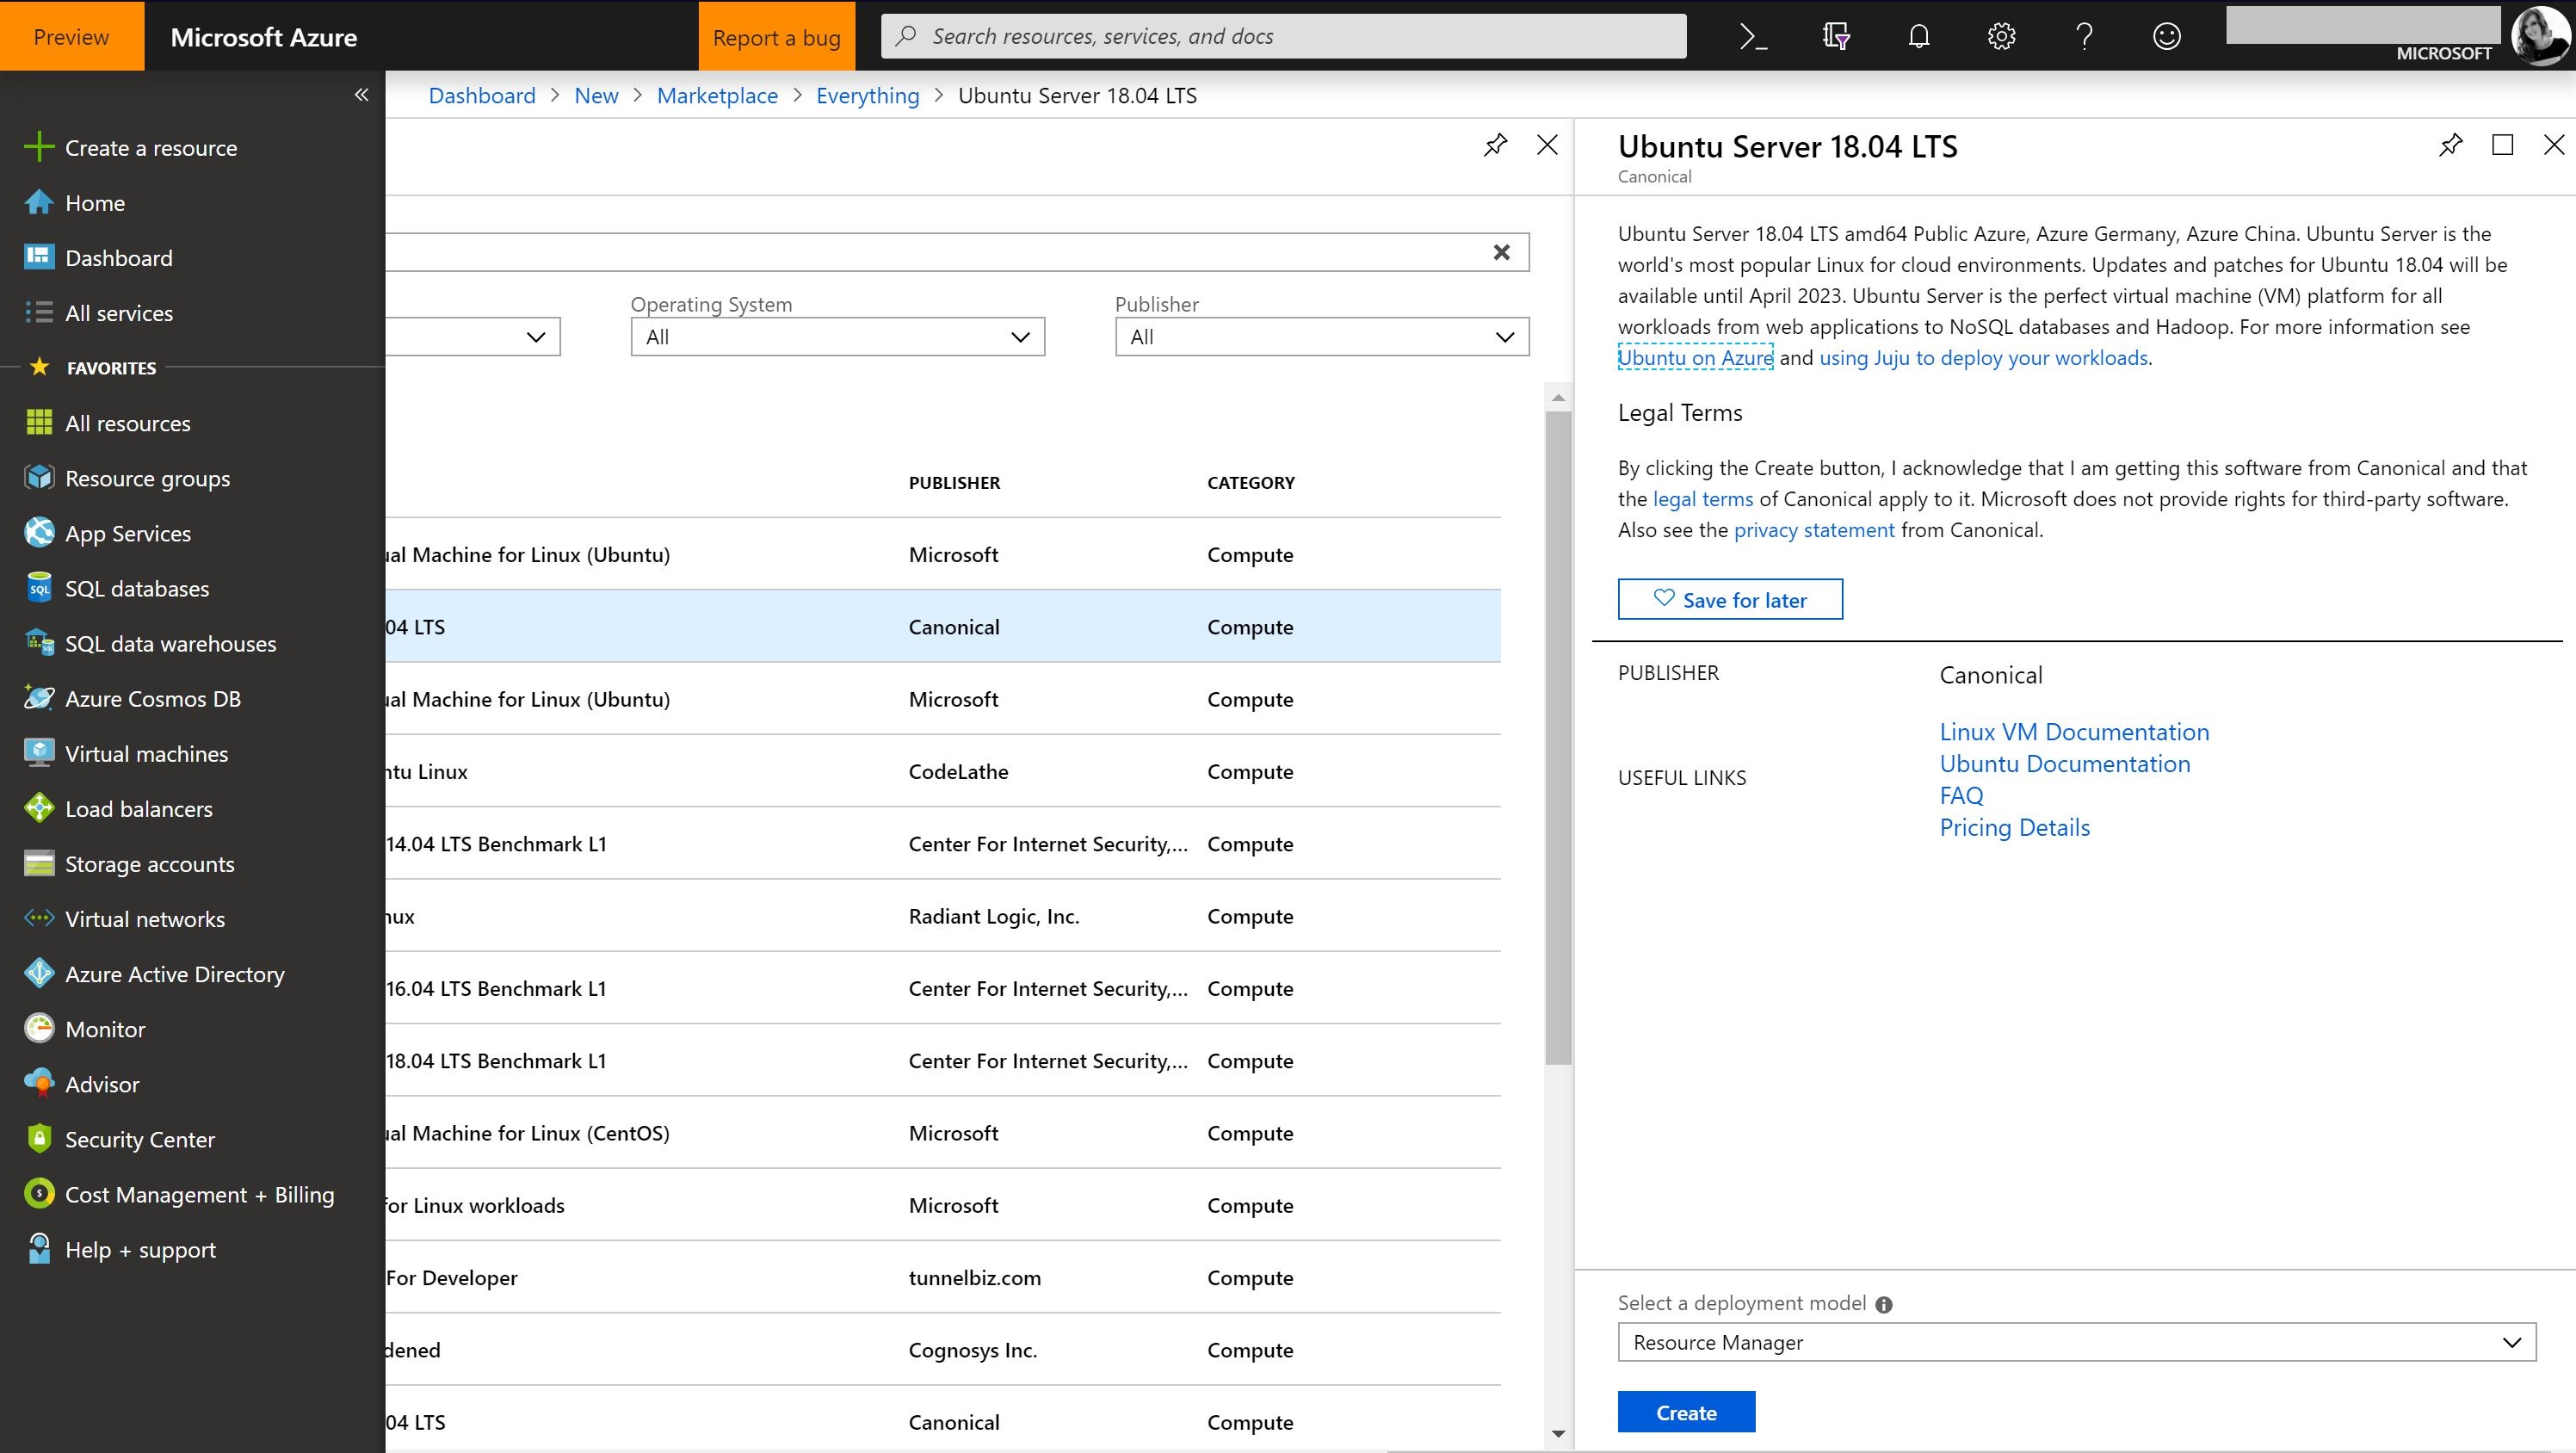
Create a Virtual Machine in Azure, by clicking create a resource in the top left corner and use the search bar. Type linux ubuntu and hit enter.
A long list of possible matches will be listed. Select Ubuntu Server 18.04 LTS – a new window (these are called blades in Azure) will open with an information summary about this virtual machine and what it contains.
Select create in the bottom left corner
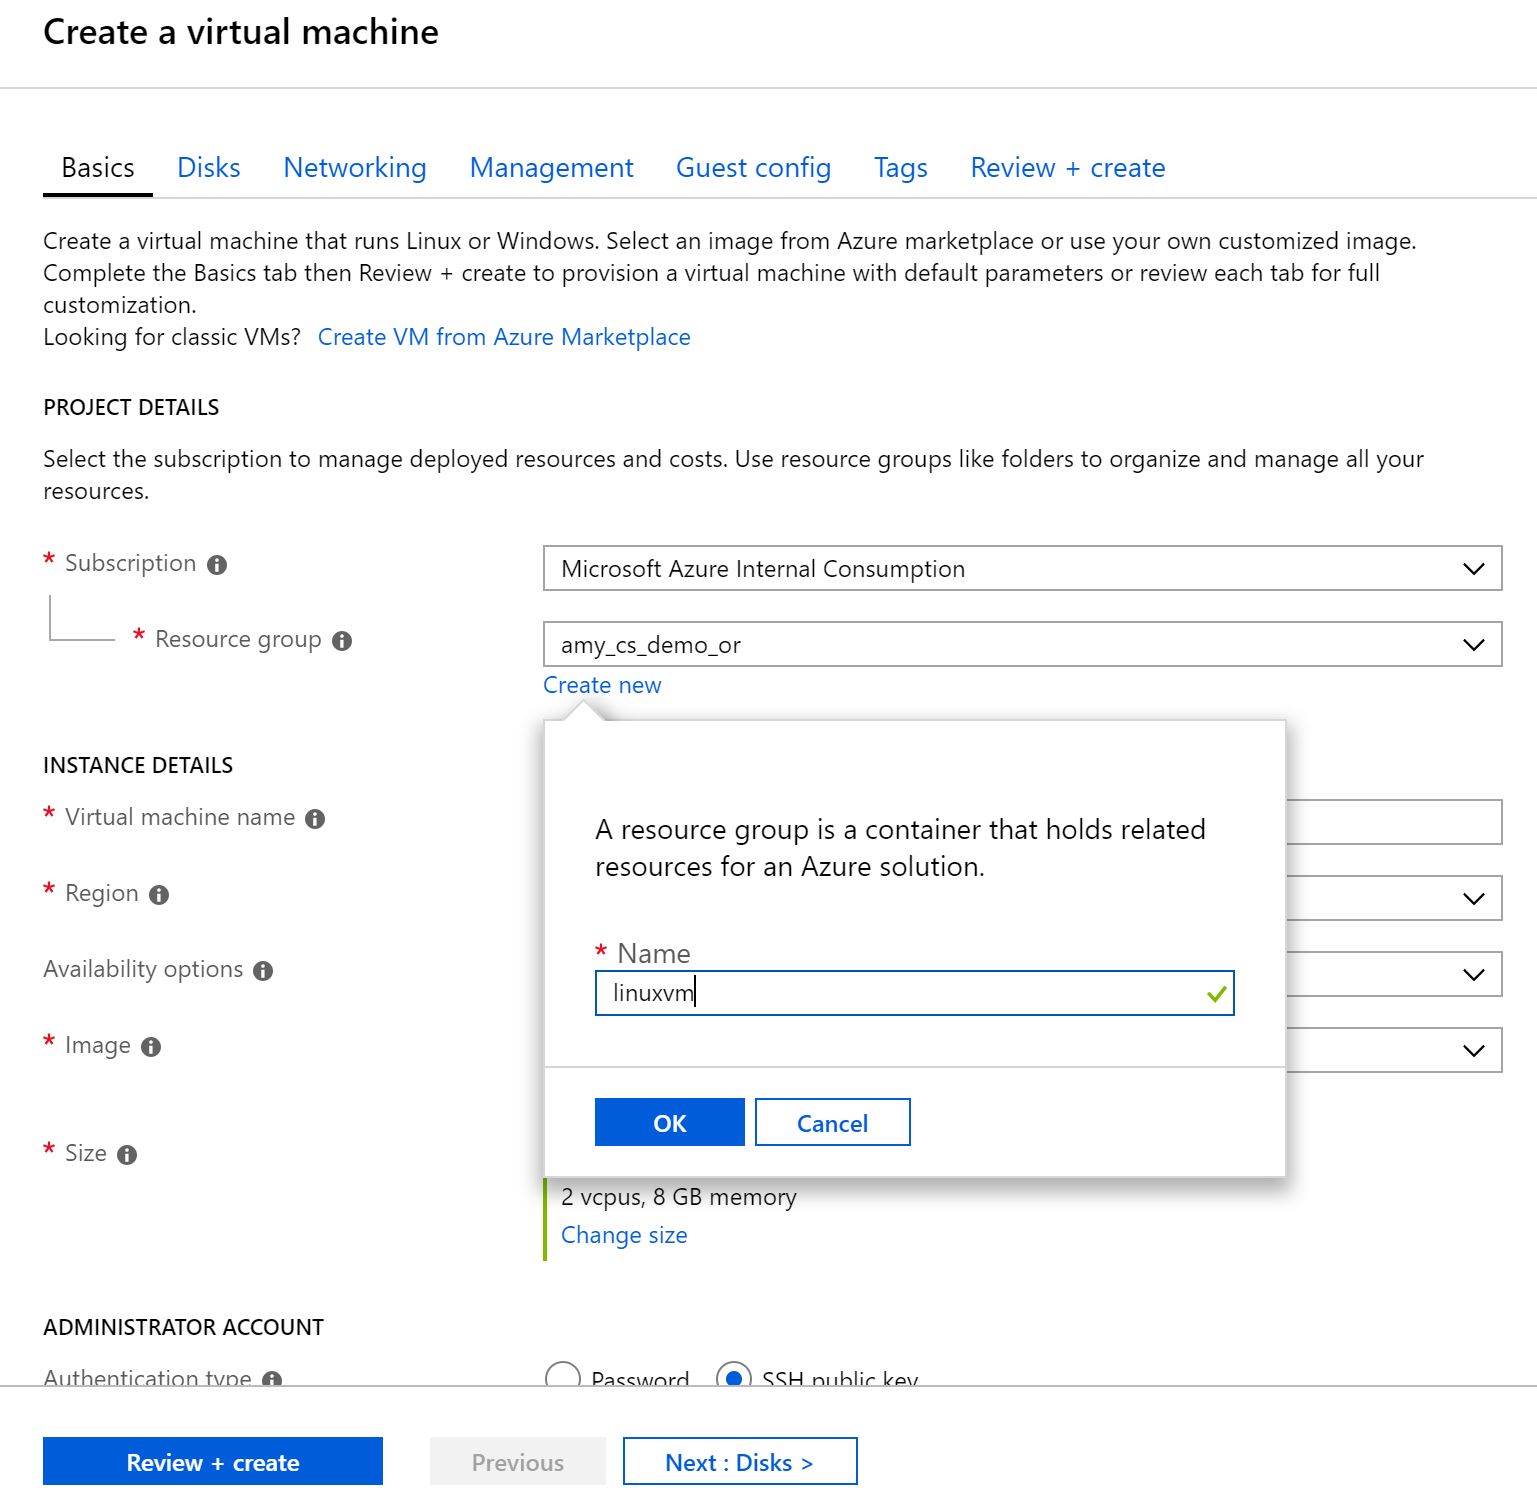
Now we need to provide some information to create and access our Linux virtual machine.
- Choose your Azure pass subscription (this may already be selected by default)
- We will
create newresource group instead of using one from the dropdown – call the resource group a sensible name (such aslinuxvm) - choose
OK
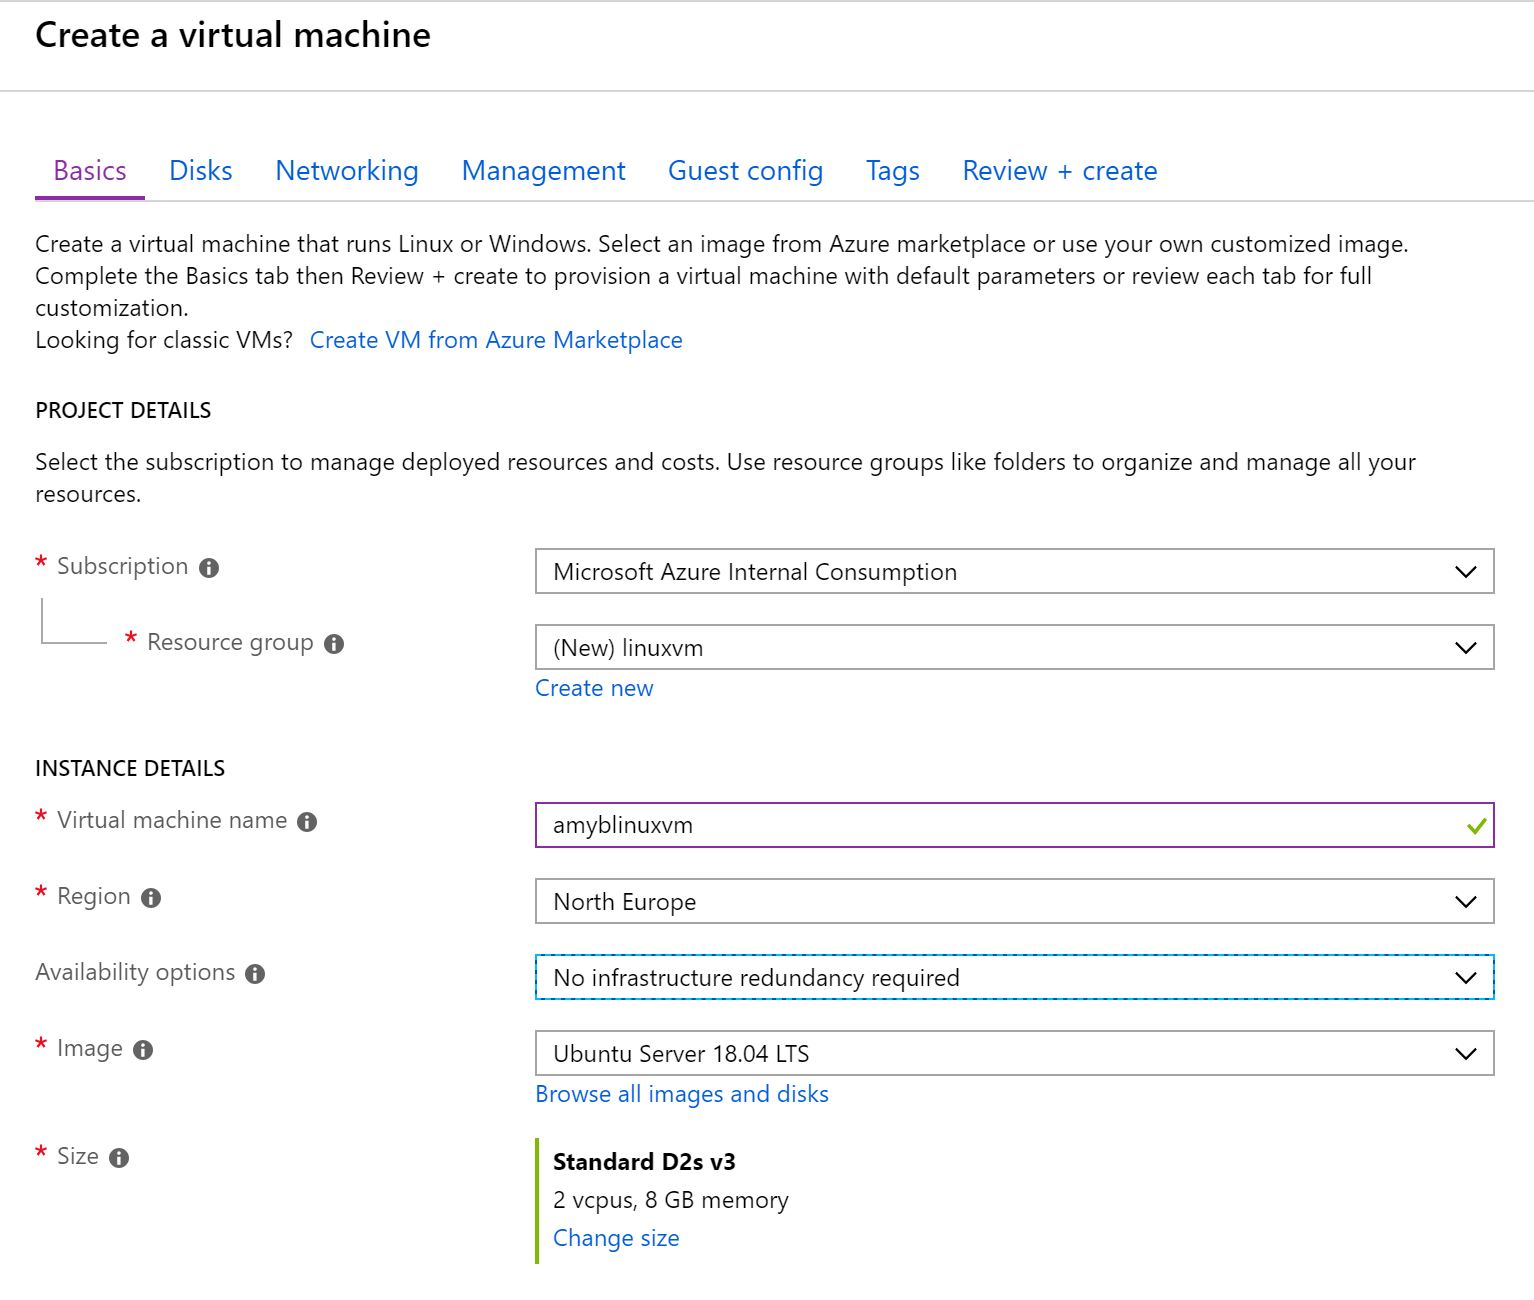
Next, we create some details about the virtual machine instance:
- Virtual Machine Name: <choose a name> (example: ‘<alias>linuxvm’)
- Region: North Europe
- Availability Options: ‘no infrastructure redundancy required’
- Image: Ubuntu Server 18.04 LTS
- Size: Standard D2s v3
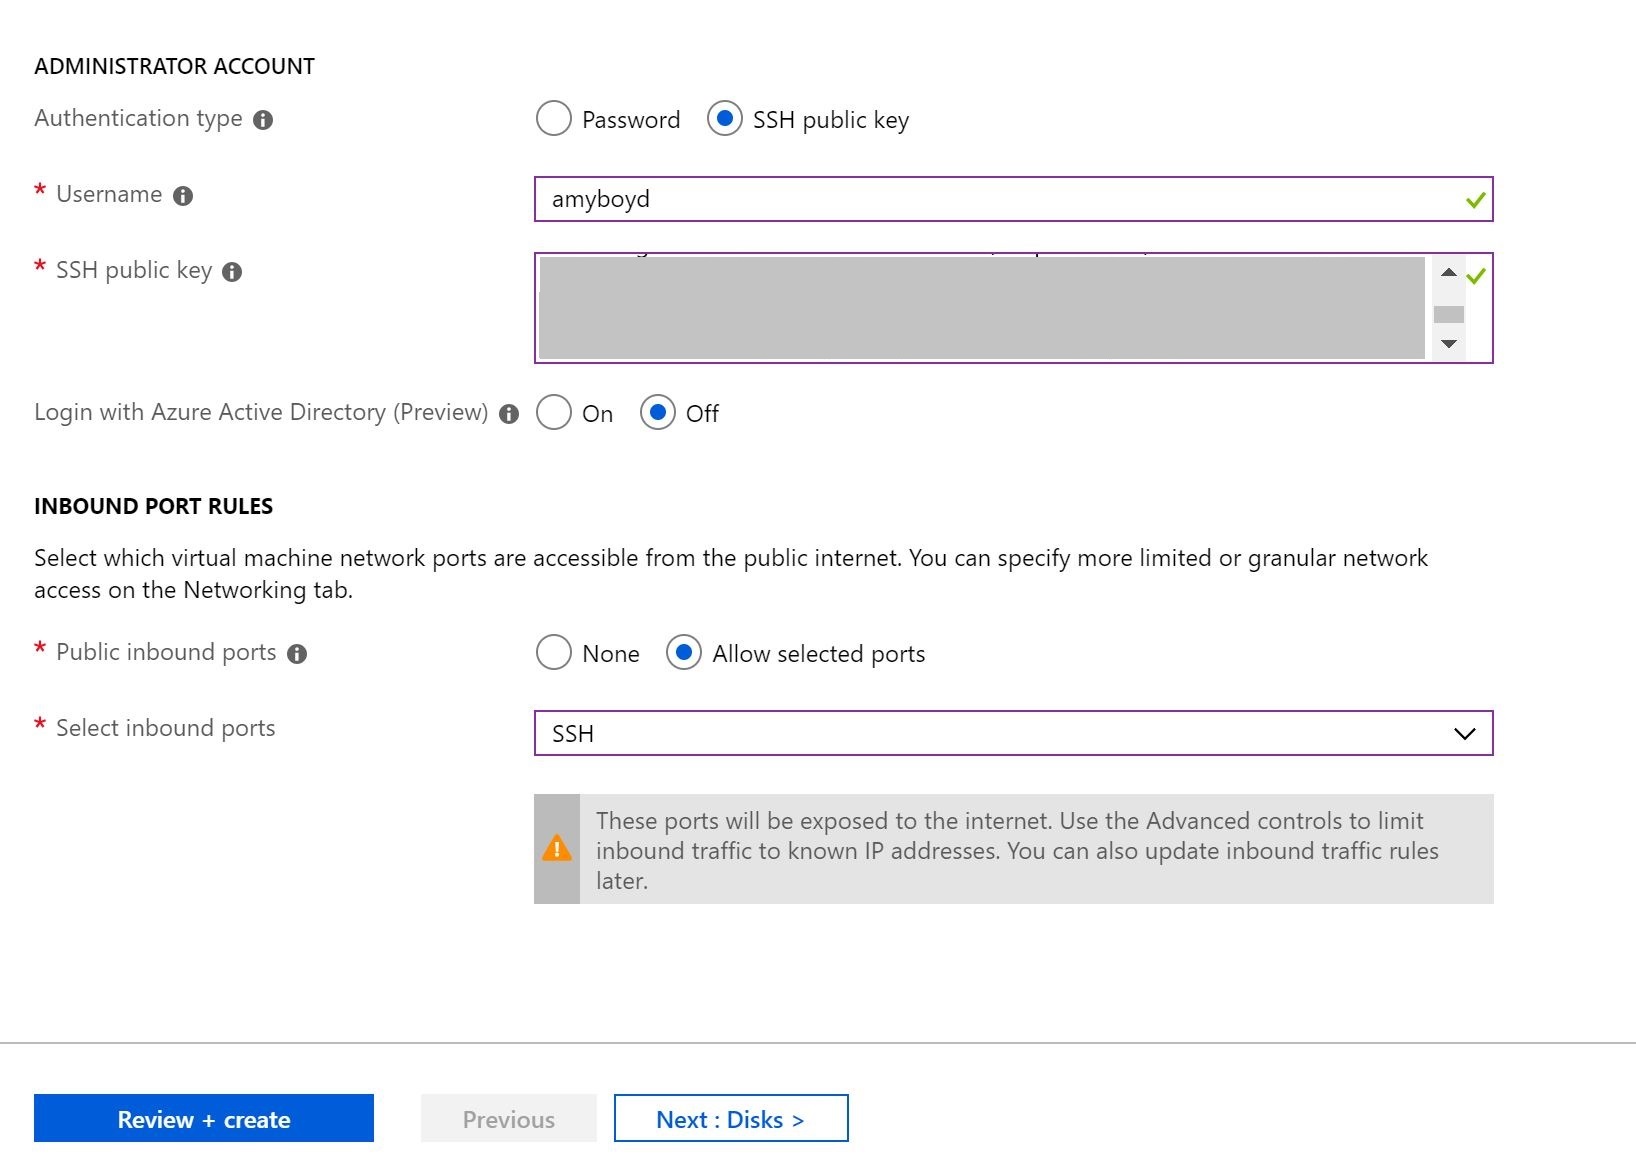
Now select how to access the account on the VM. In this case we will choose SSH key, however you can choose username and password instead
- Authentication Type: SSH public key
- Username: <alias> (example: ‘amyboyd’)
- SSH public key: enter the long SSH key we created in the Azure shell earlier
- In the port selection, choose ‘Allow selected ports’ and choose SSH(22)
- Then select ‘Next :Disks >’
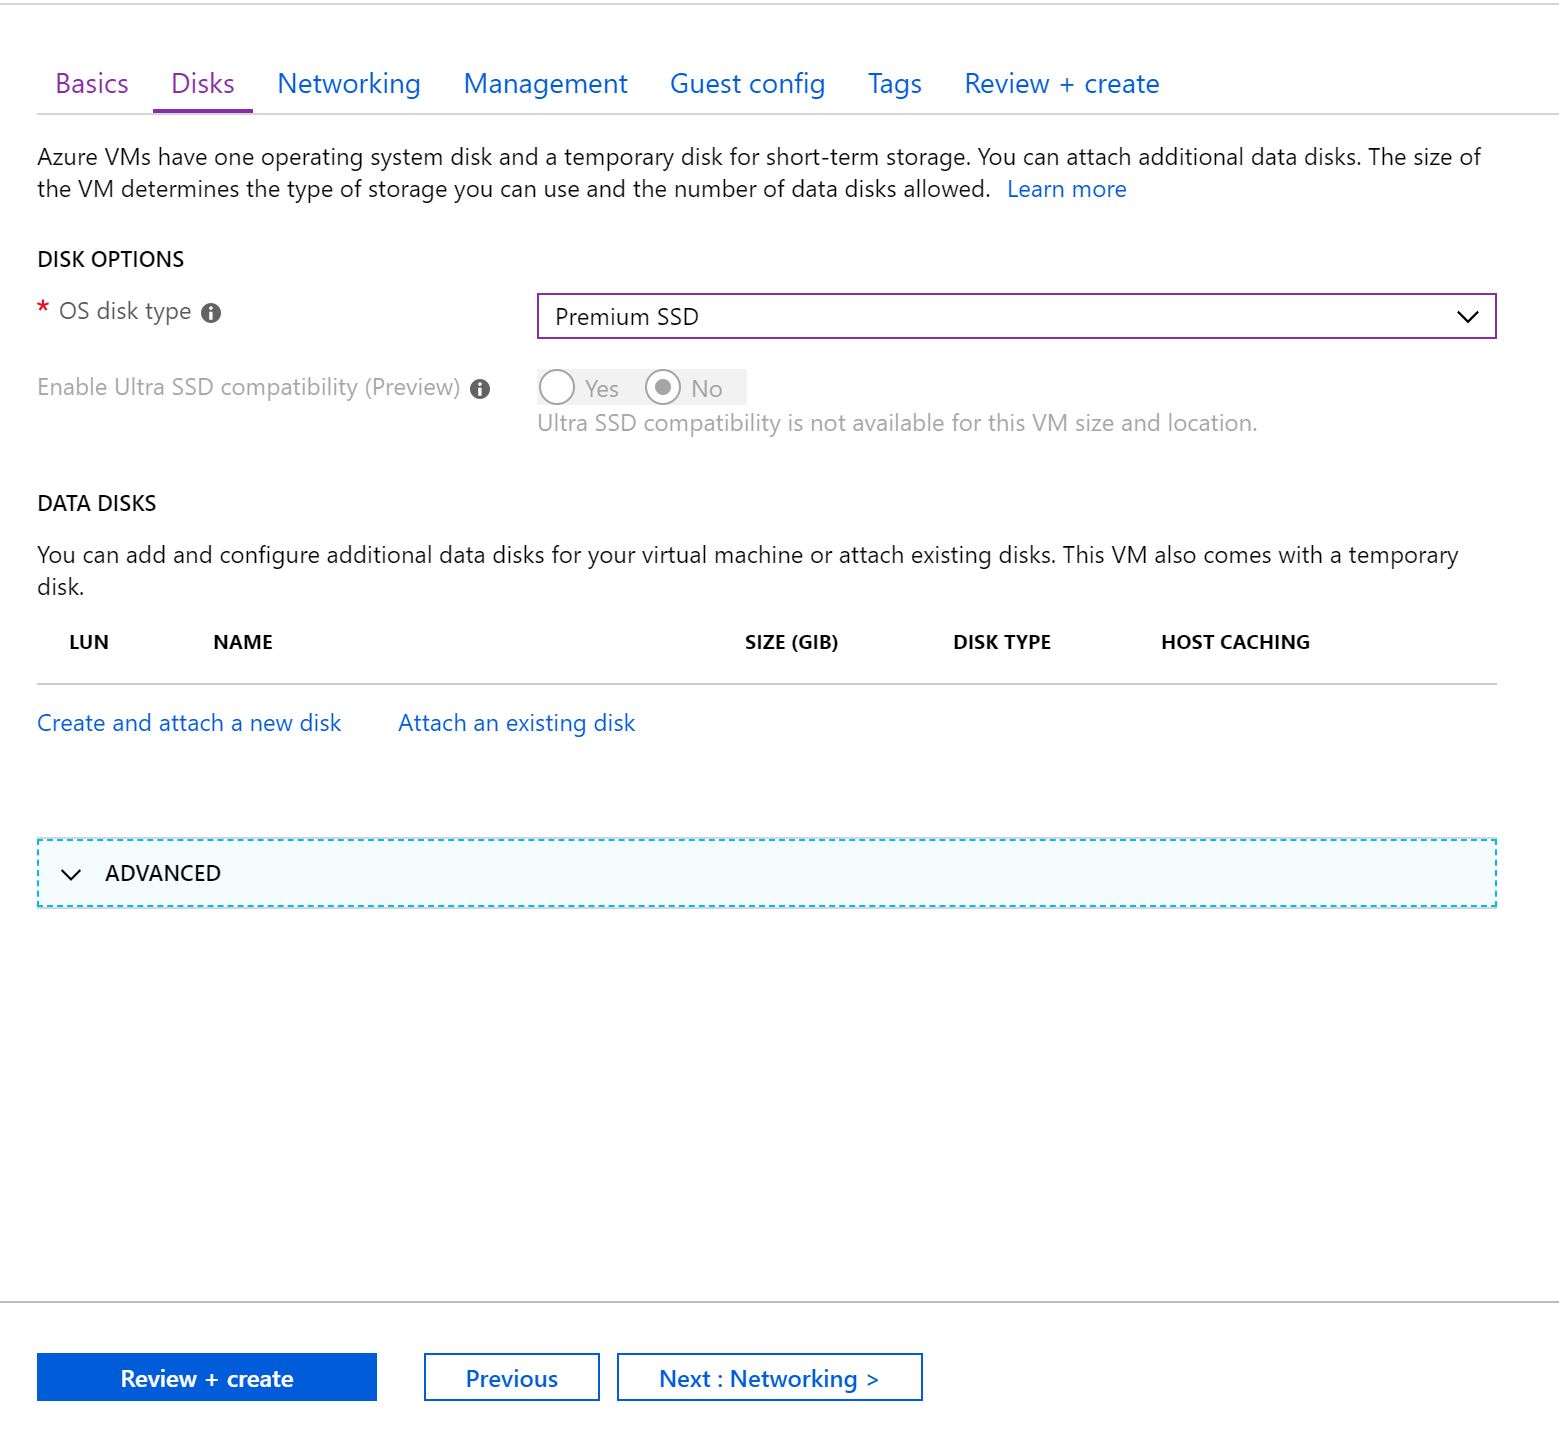
On the Disks page keep all the defaults selected and choose Next
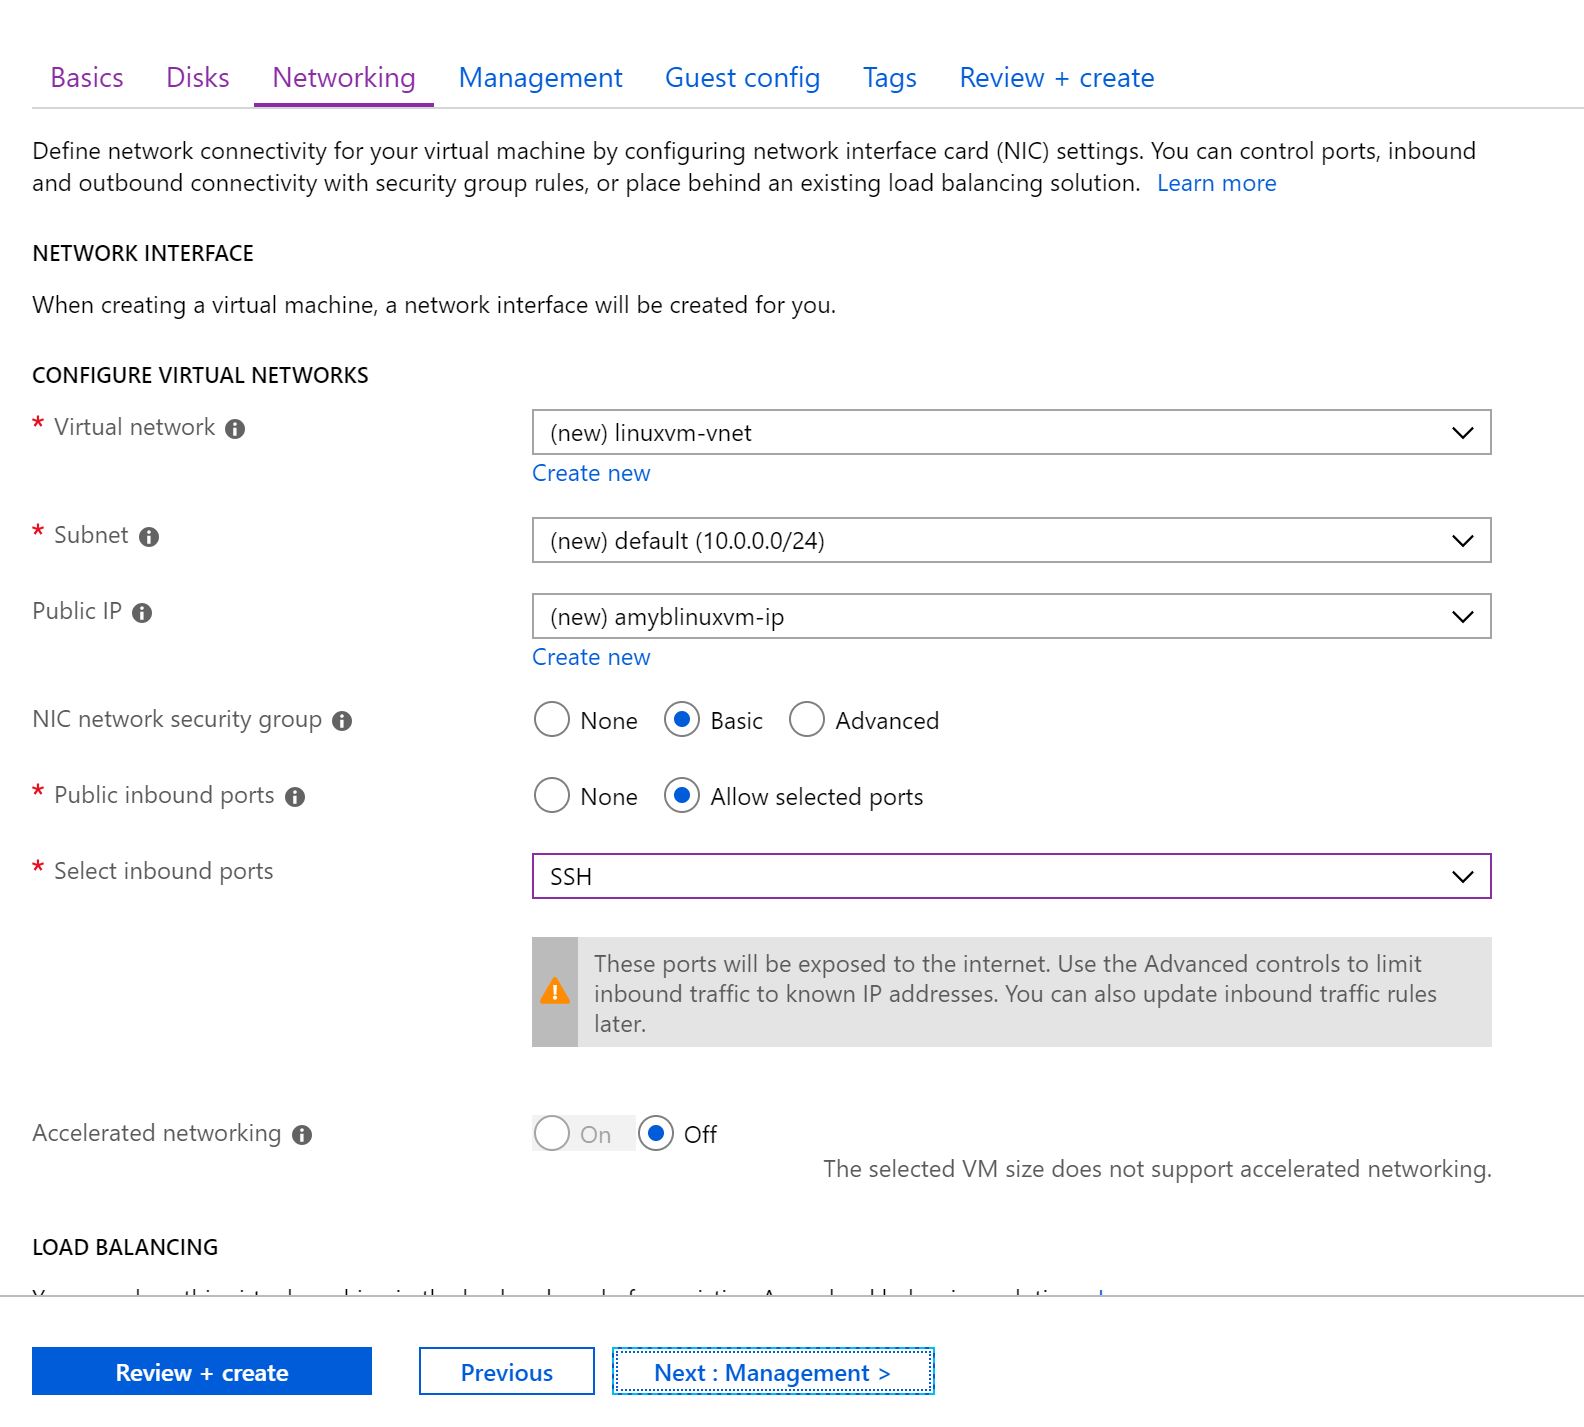
On the Networking page, keep all the defaults again and select next.
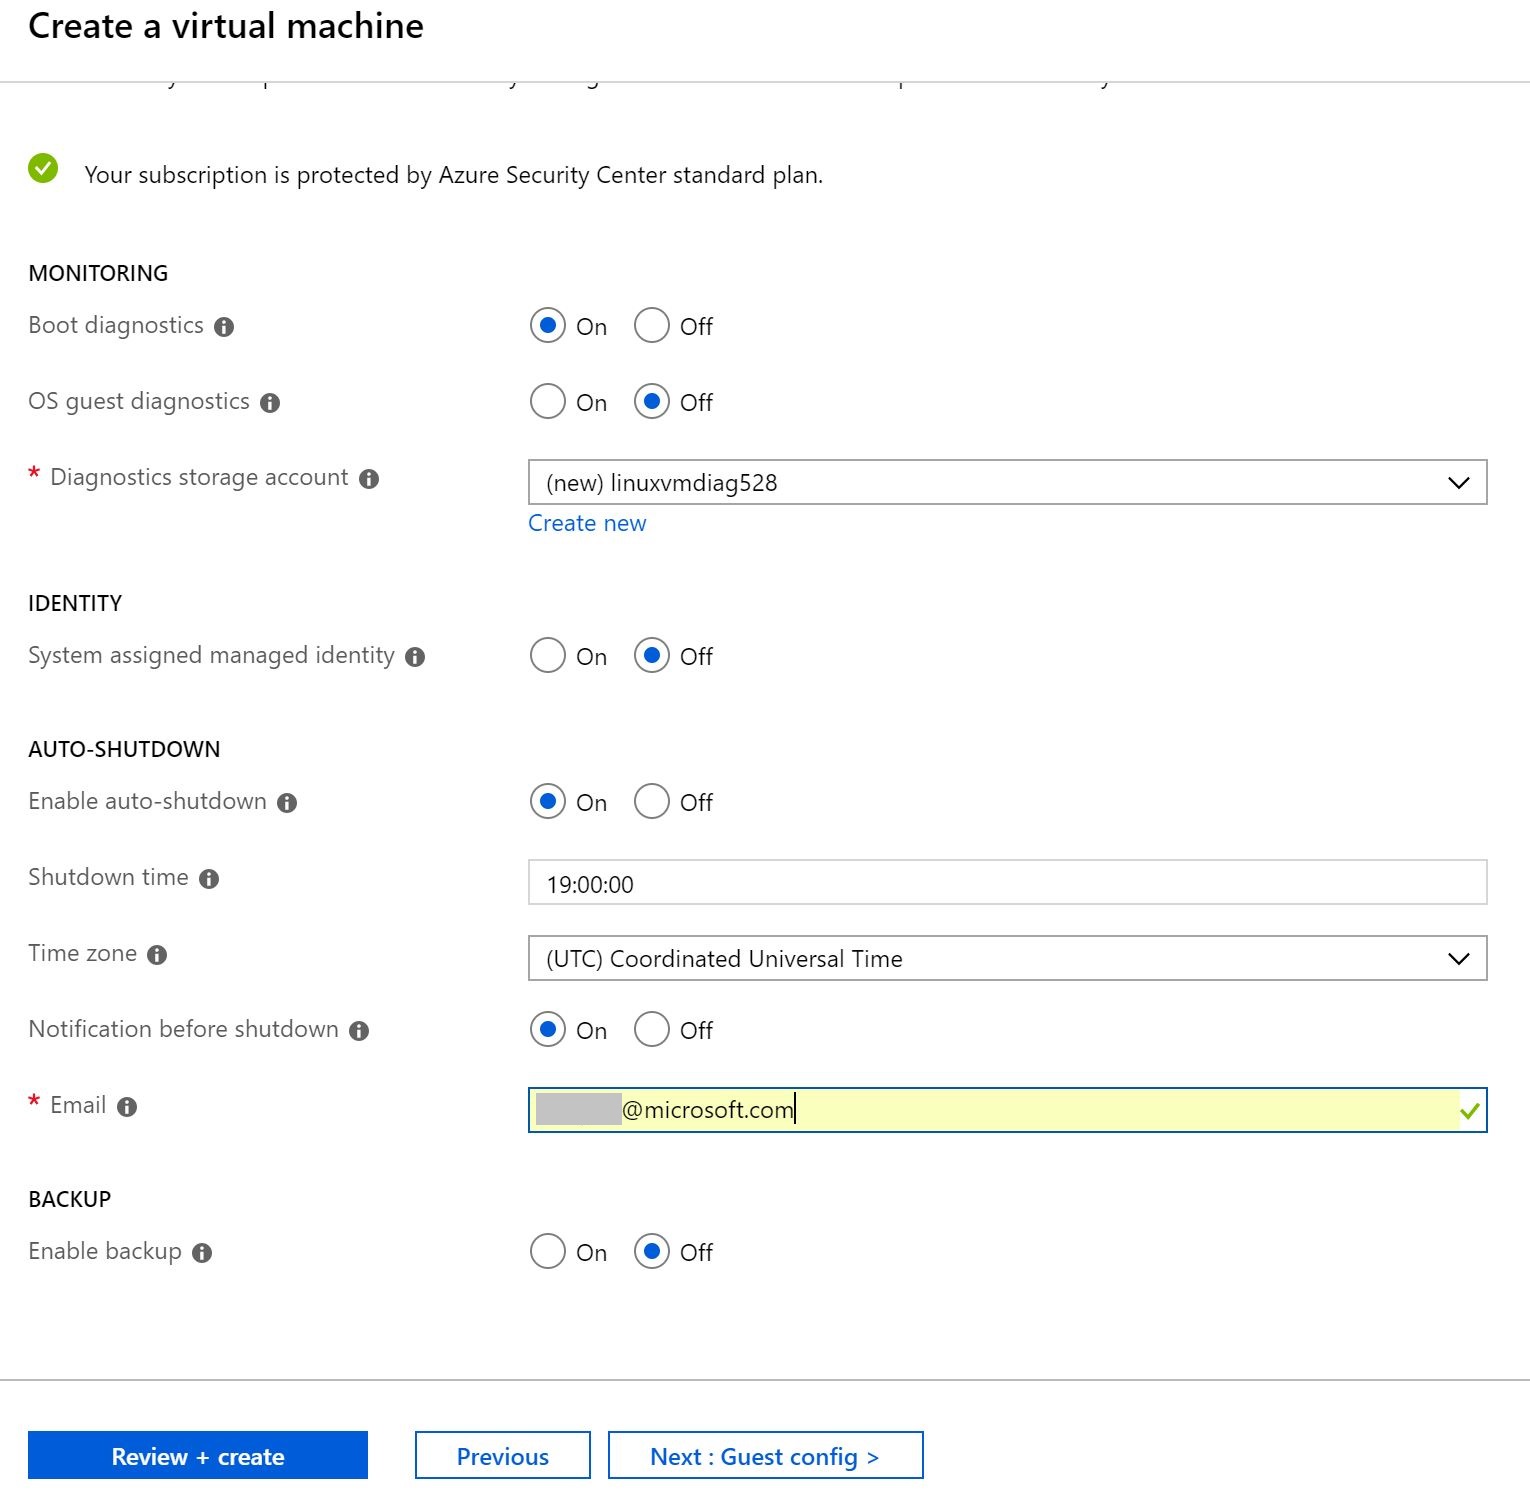
On the management page,
- Enable auto-shutdown to ‘on’ choose a sensible shutdown time and timezone.
- Also select ‘on’ for Notification before shutdown and enter your email address here.
- Now choose Next
Choose next on Guest Config with no changes
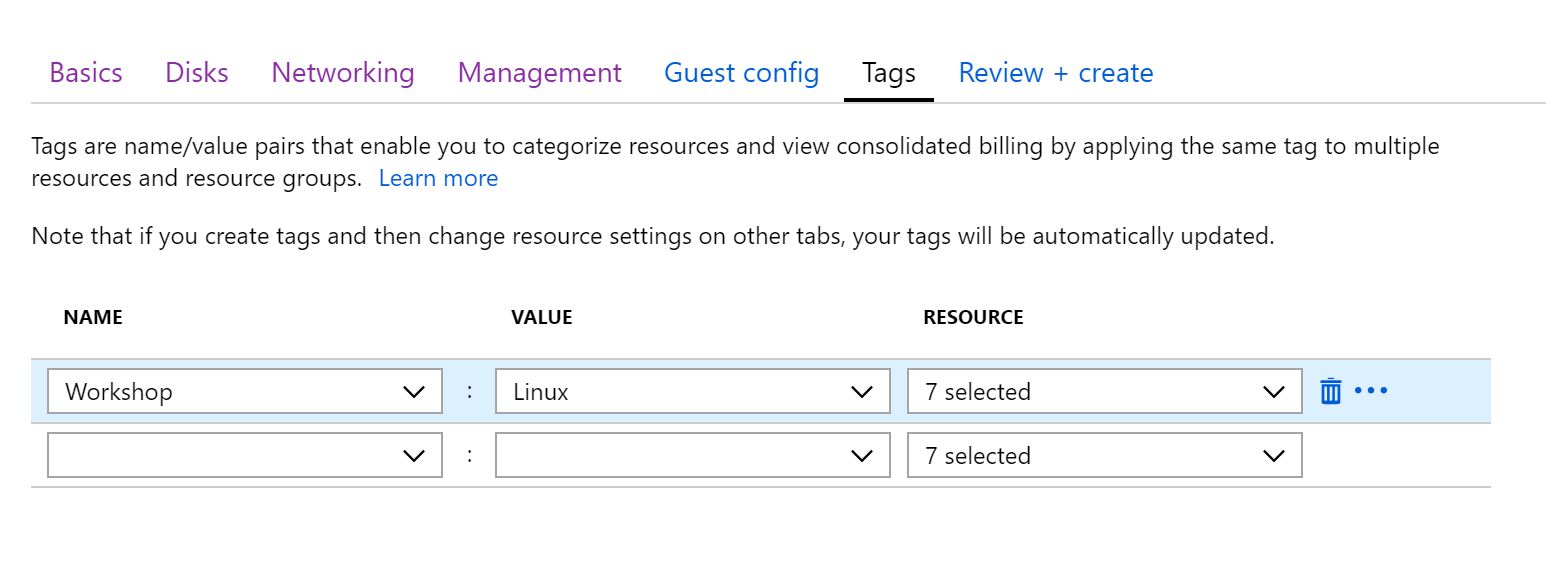
You can, if you wish, add tags to your virtual machine which can be viewed in the portal and during your Azure Billing statement.
Add a key value pair of ‘Workshop : Linux’ Then choose Next
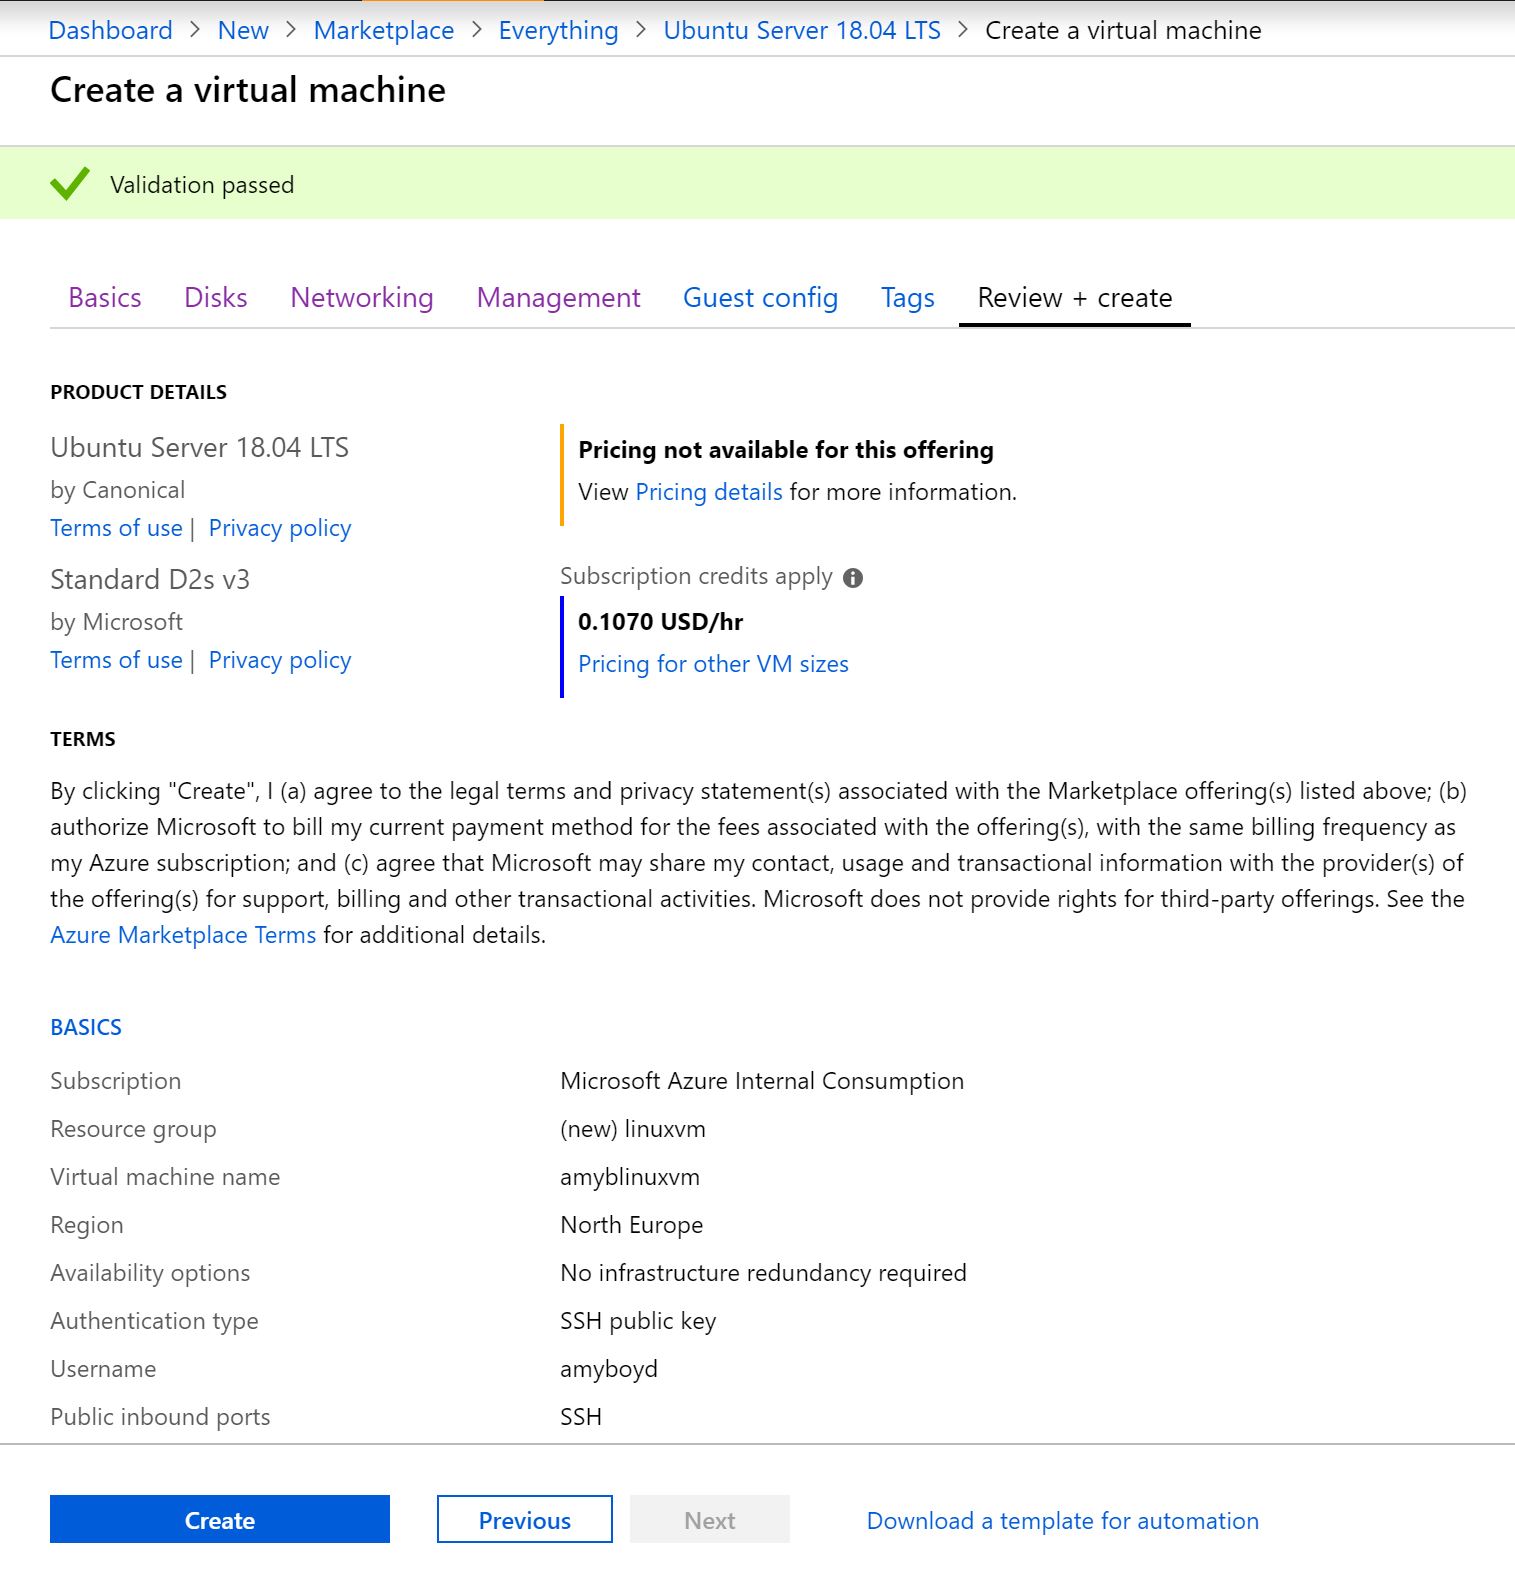
Now you are on the final validation page which lists the cost and details of your VM.
Once Azure completes its validation check you can select create.
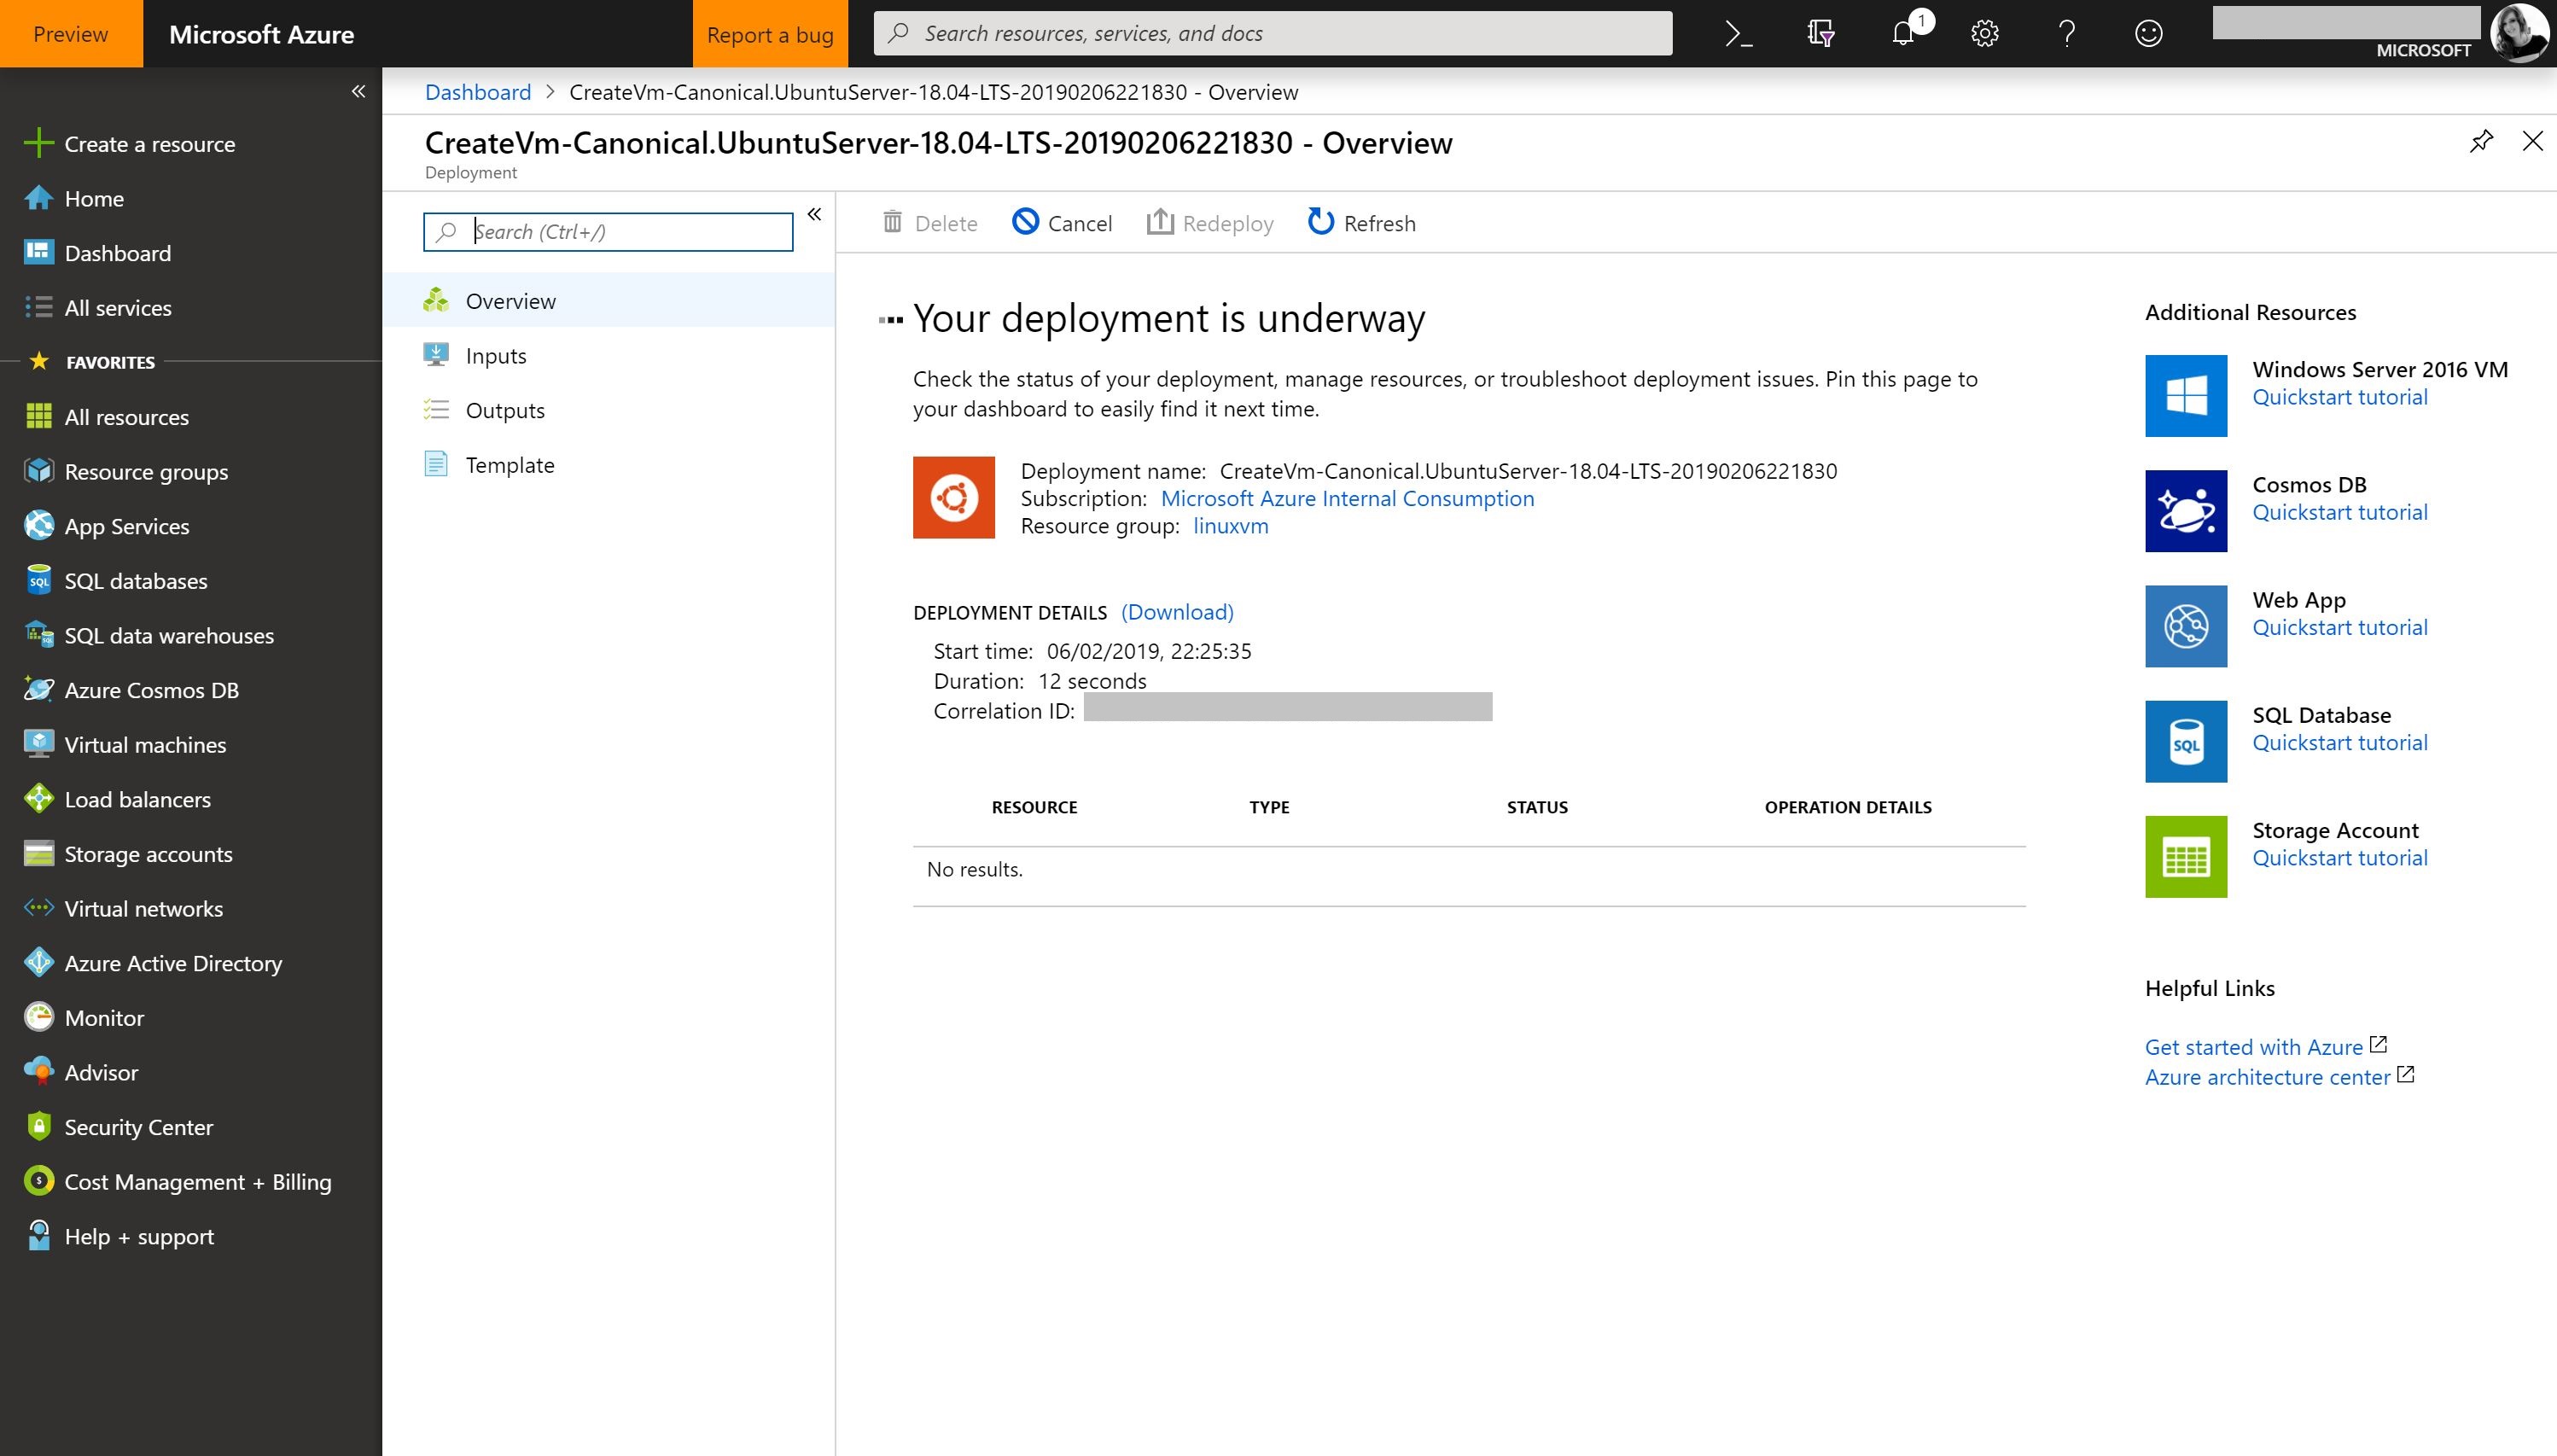
This will take you to a deployment progress page. This deployment will take around 2 mins 30 seconds in total
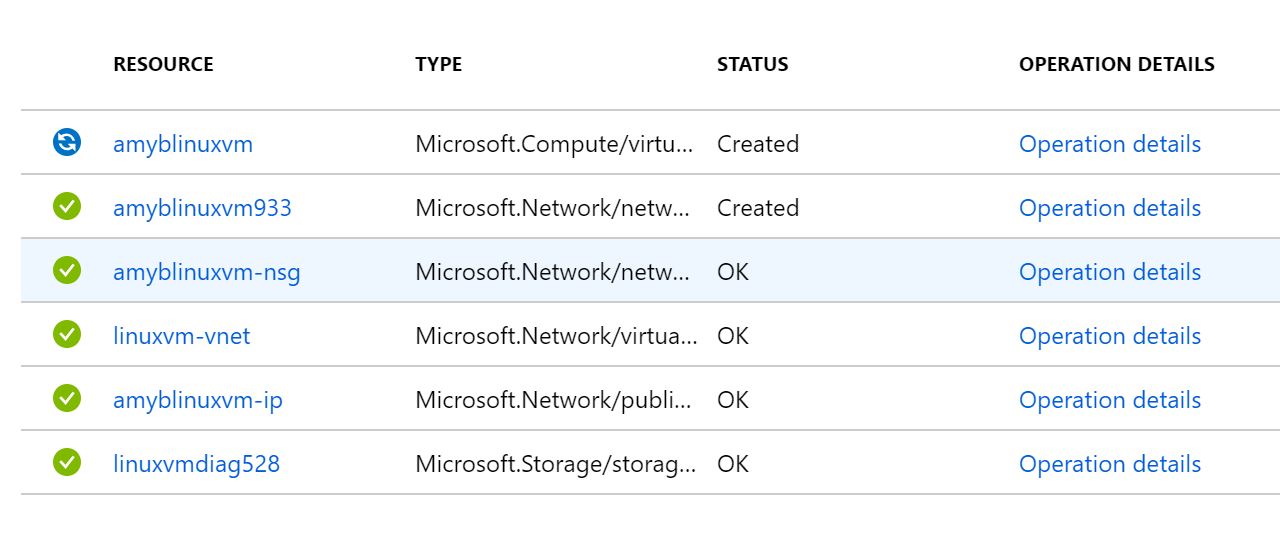
During the deployment services will be created and green ticks will be shown once completed
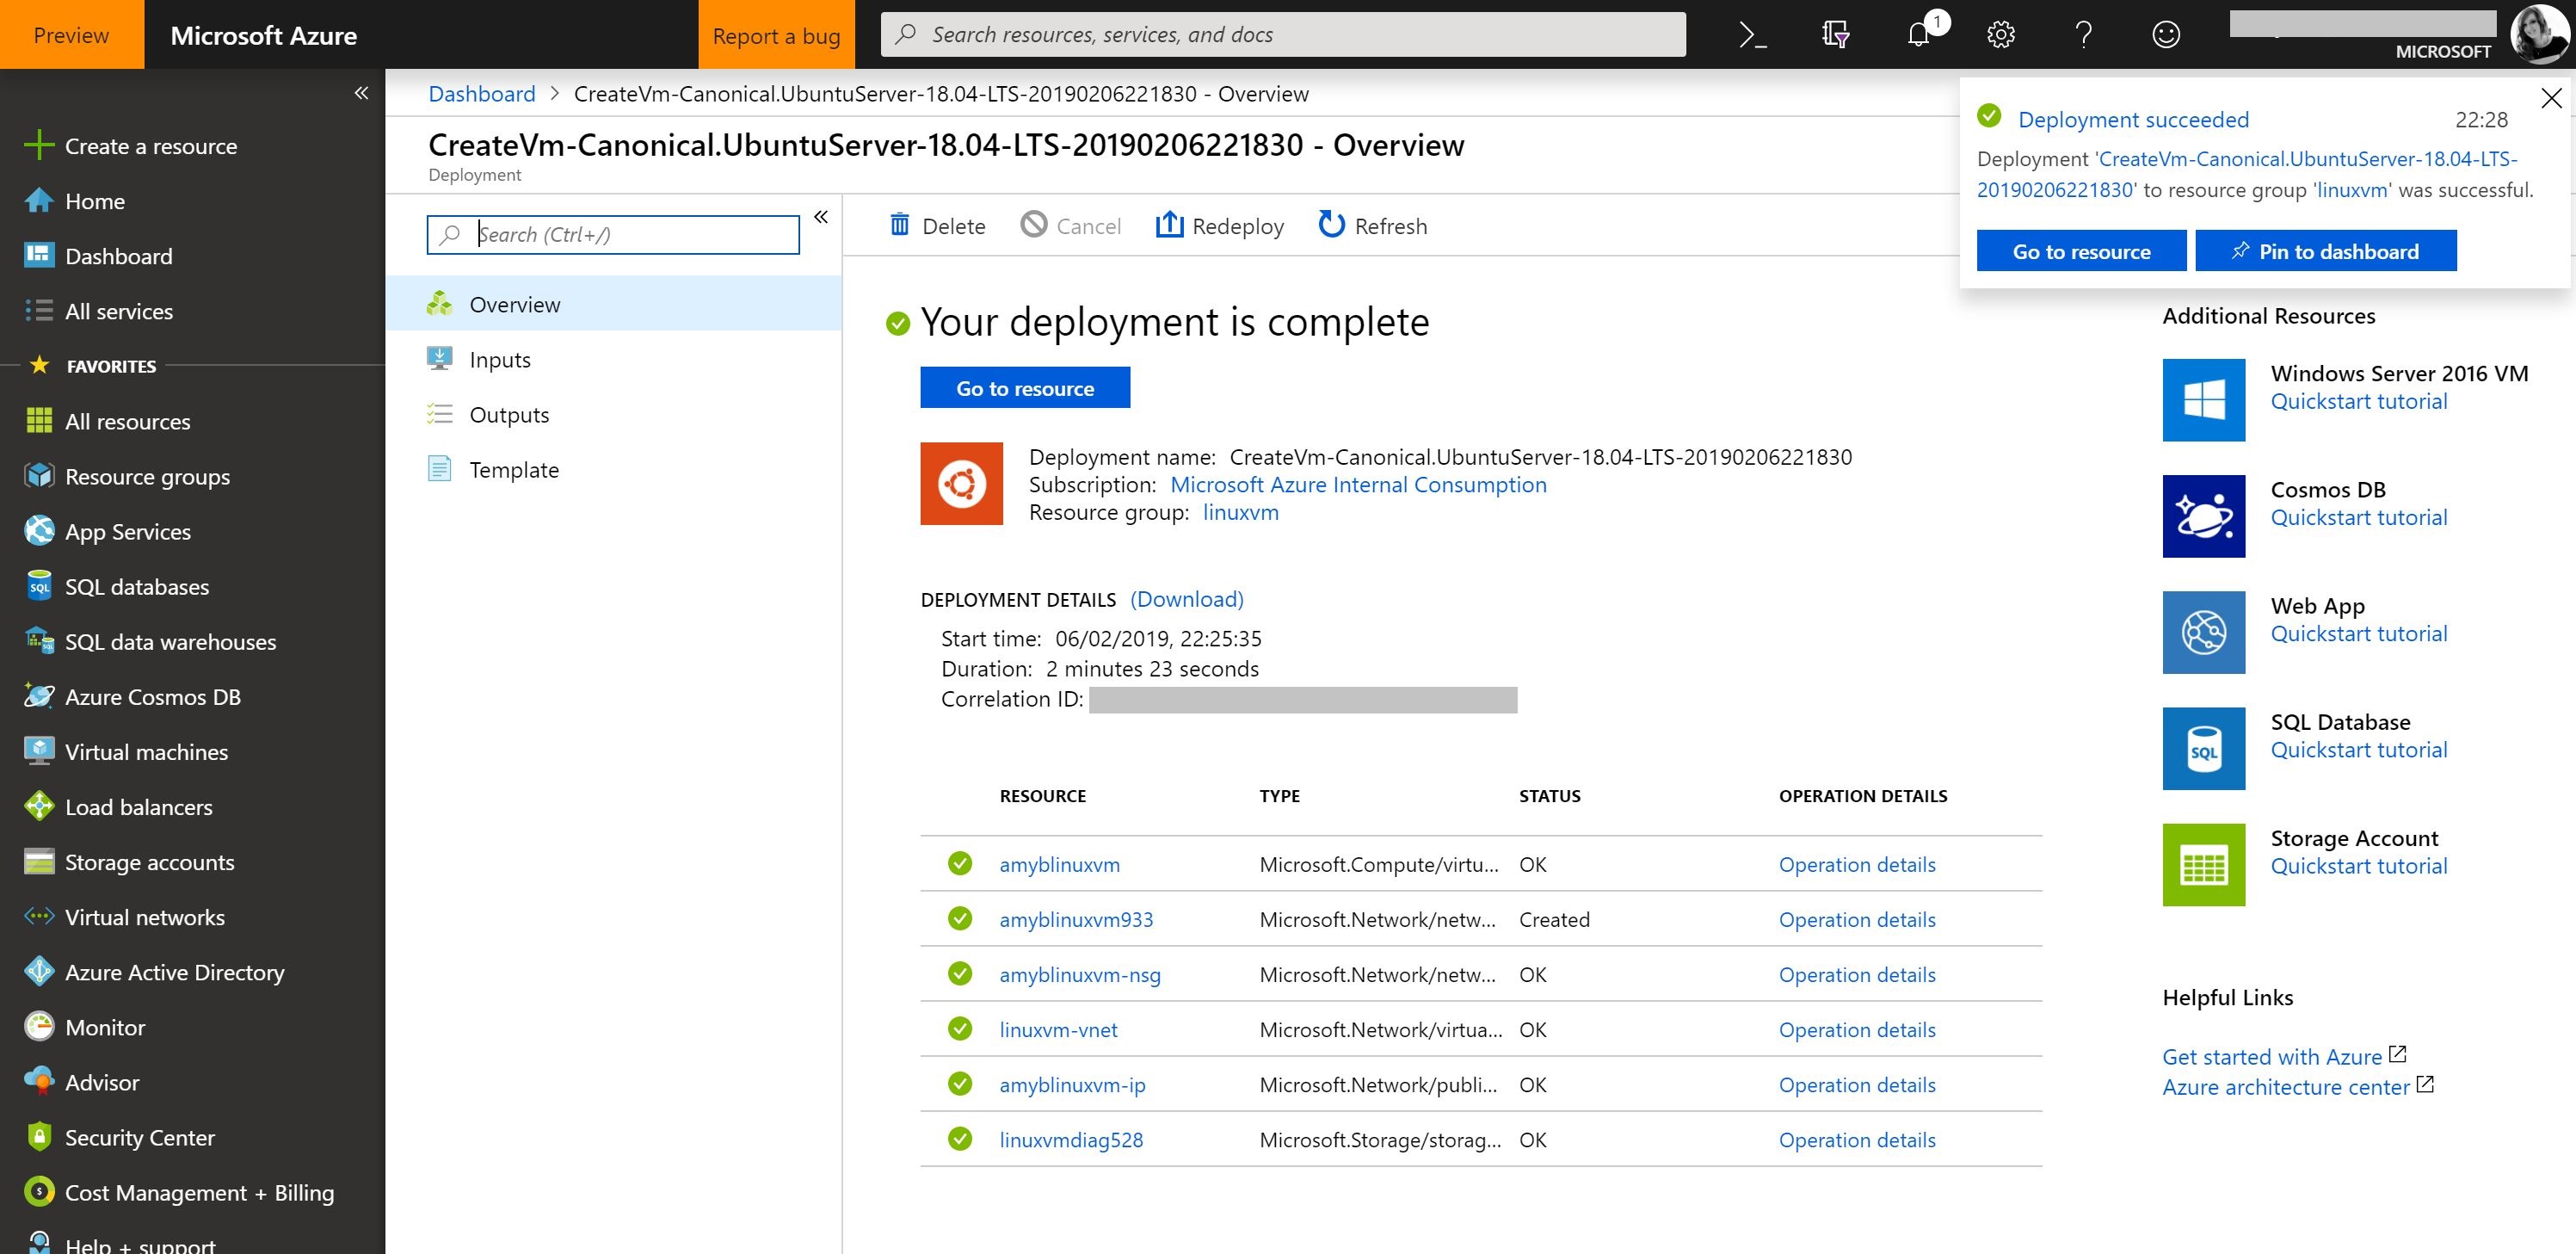
Once the full deployment is complete a notification appears and you can click Go to resource to go to the Linux Virtual Machine instance page.
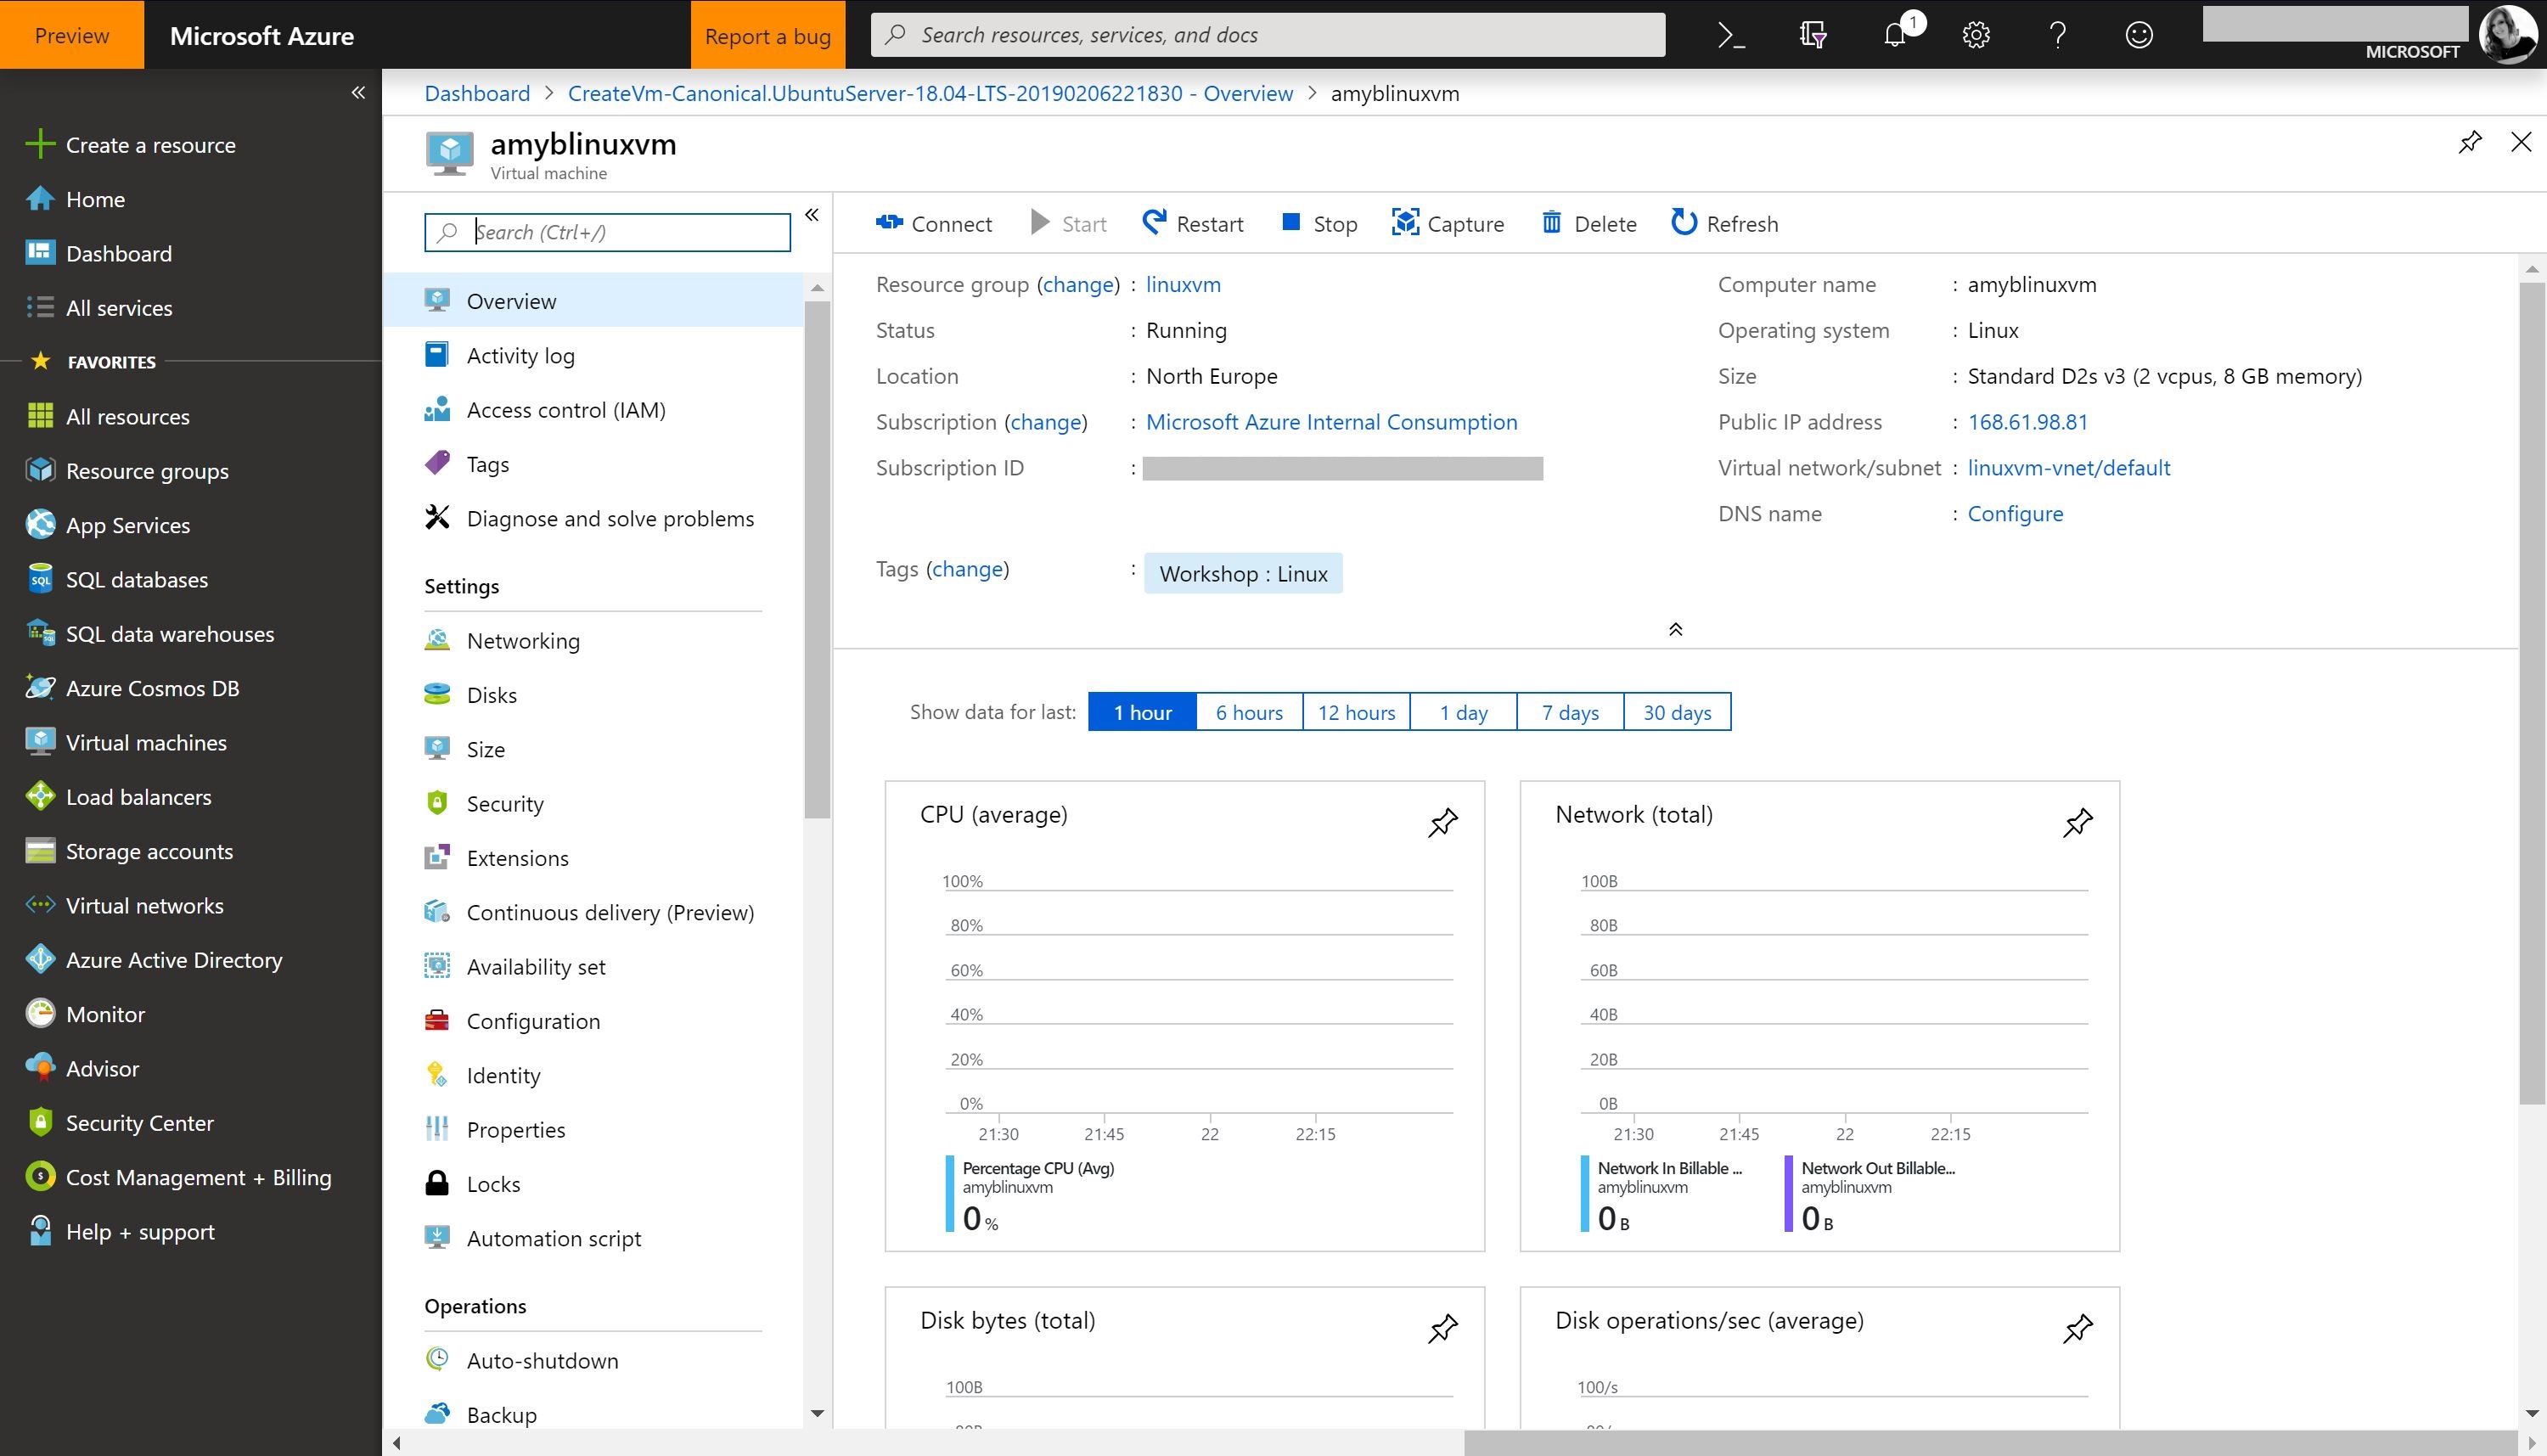
The virtual machine page will look like the below and contain all information and settings for the virtual machine
Lets now connect to our Linux virtual machine.
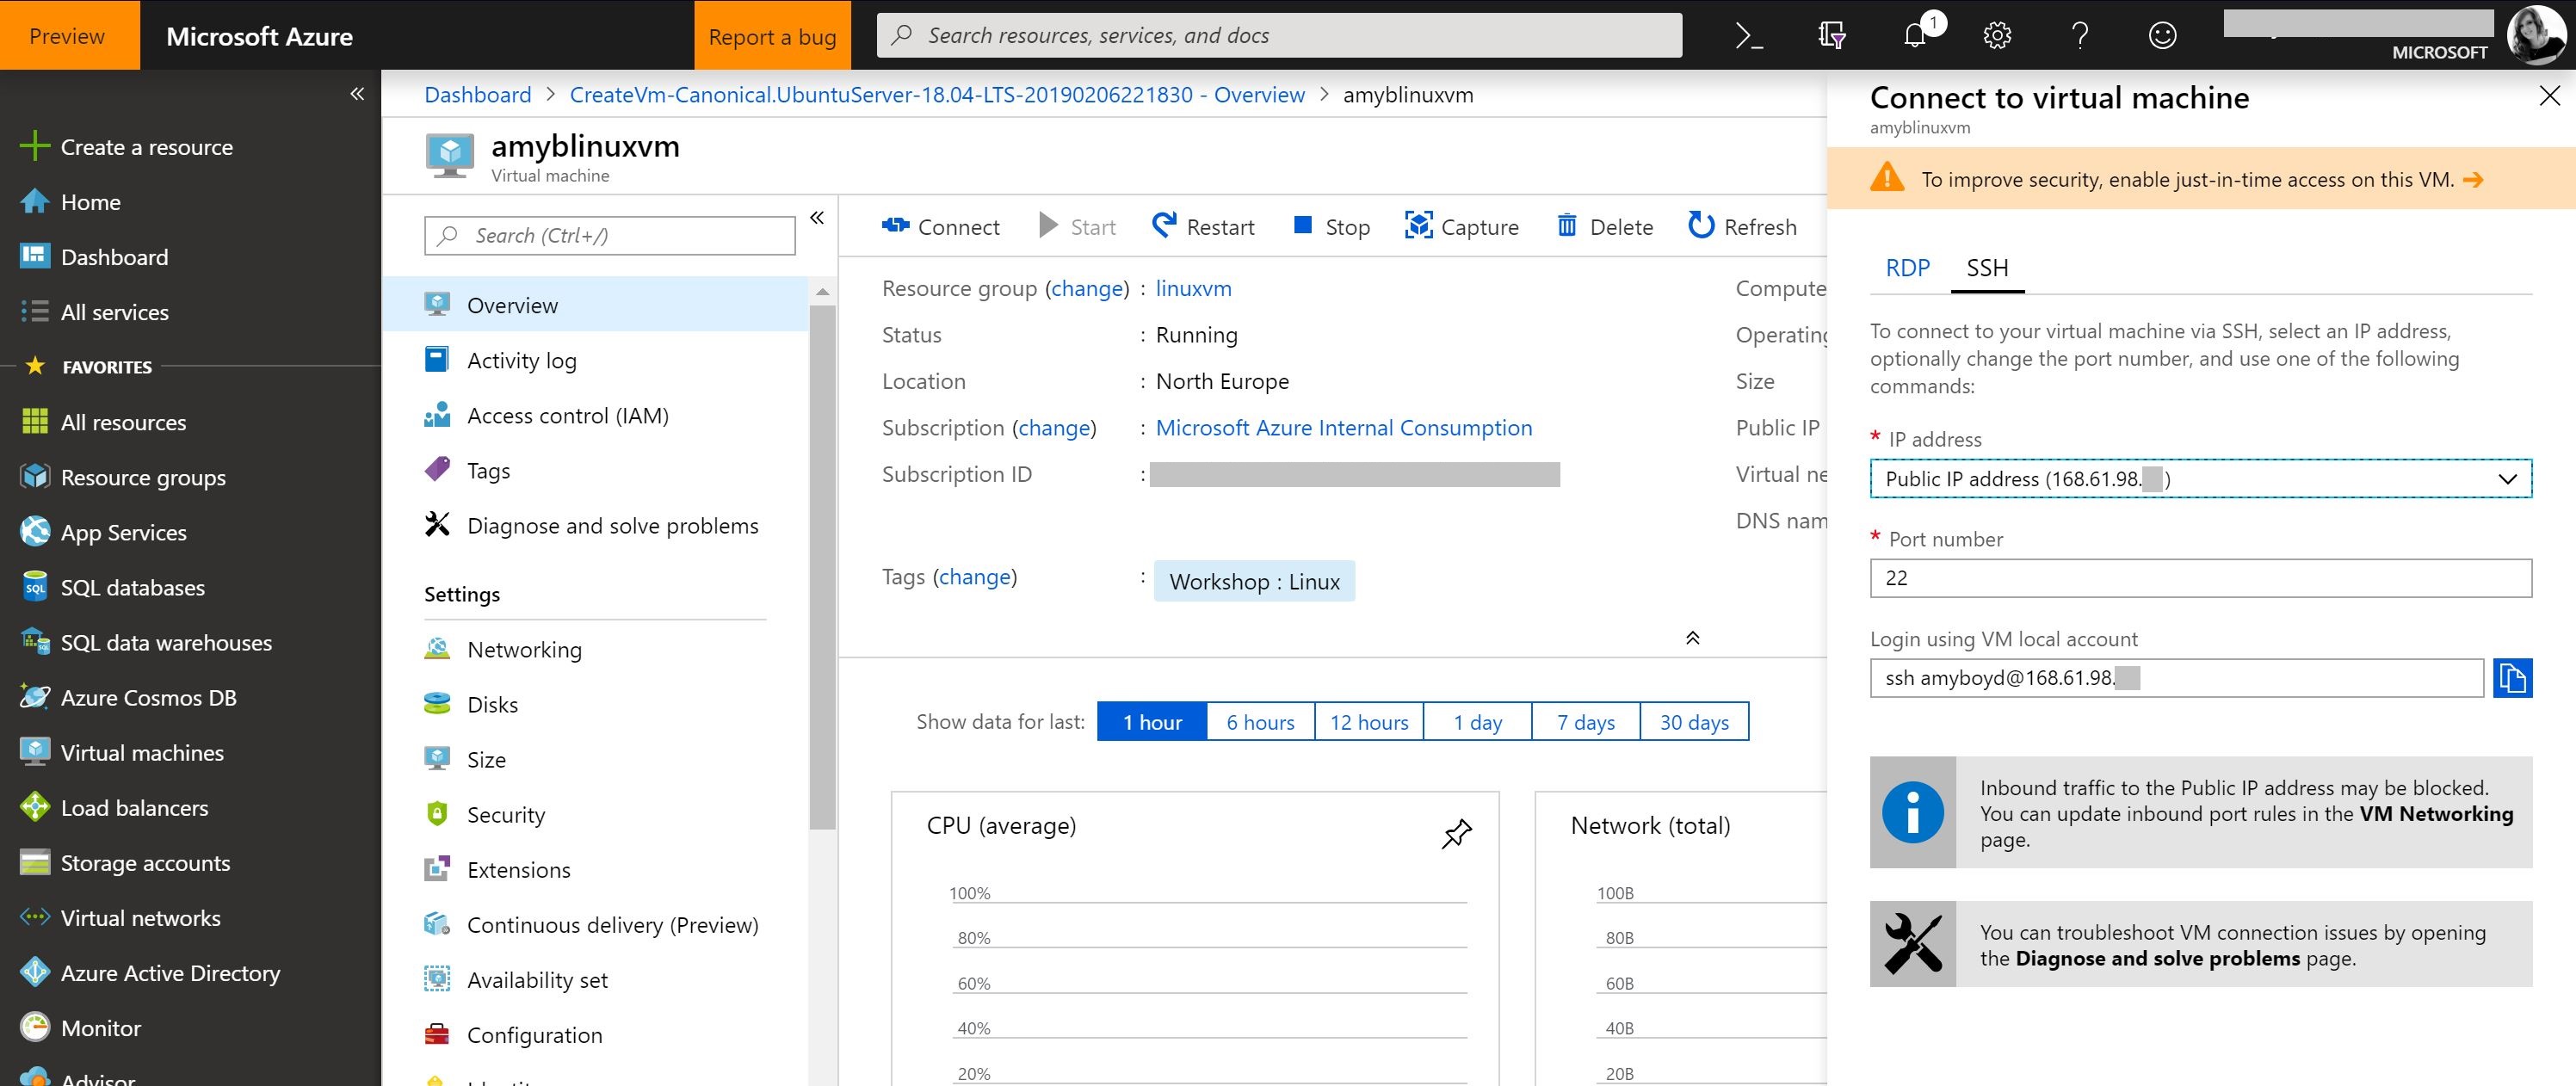
Select connect in the top bar. This will bring up the ssh command and information you need to connect to this machine remotely
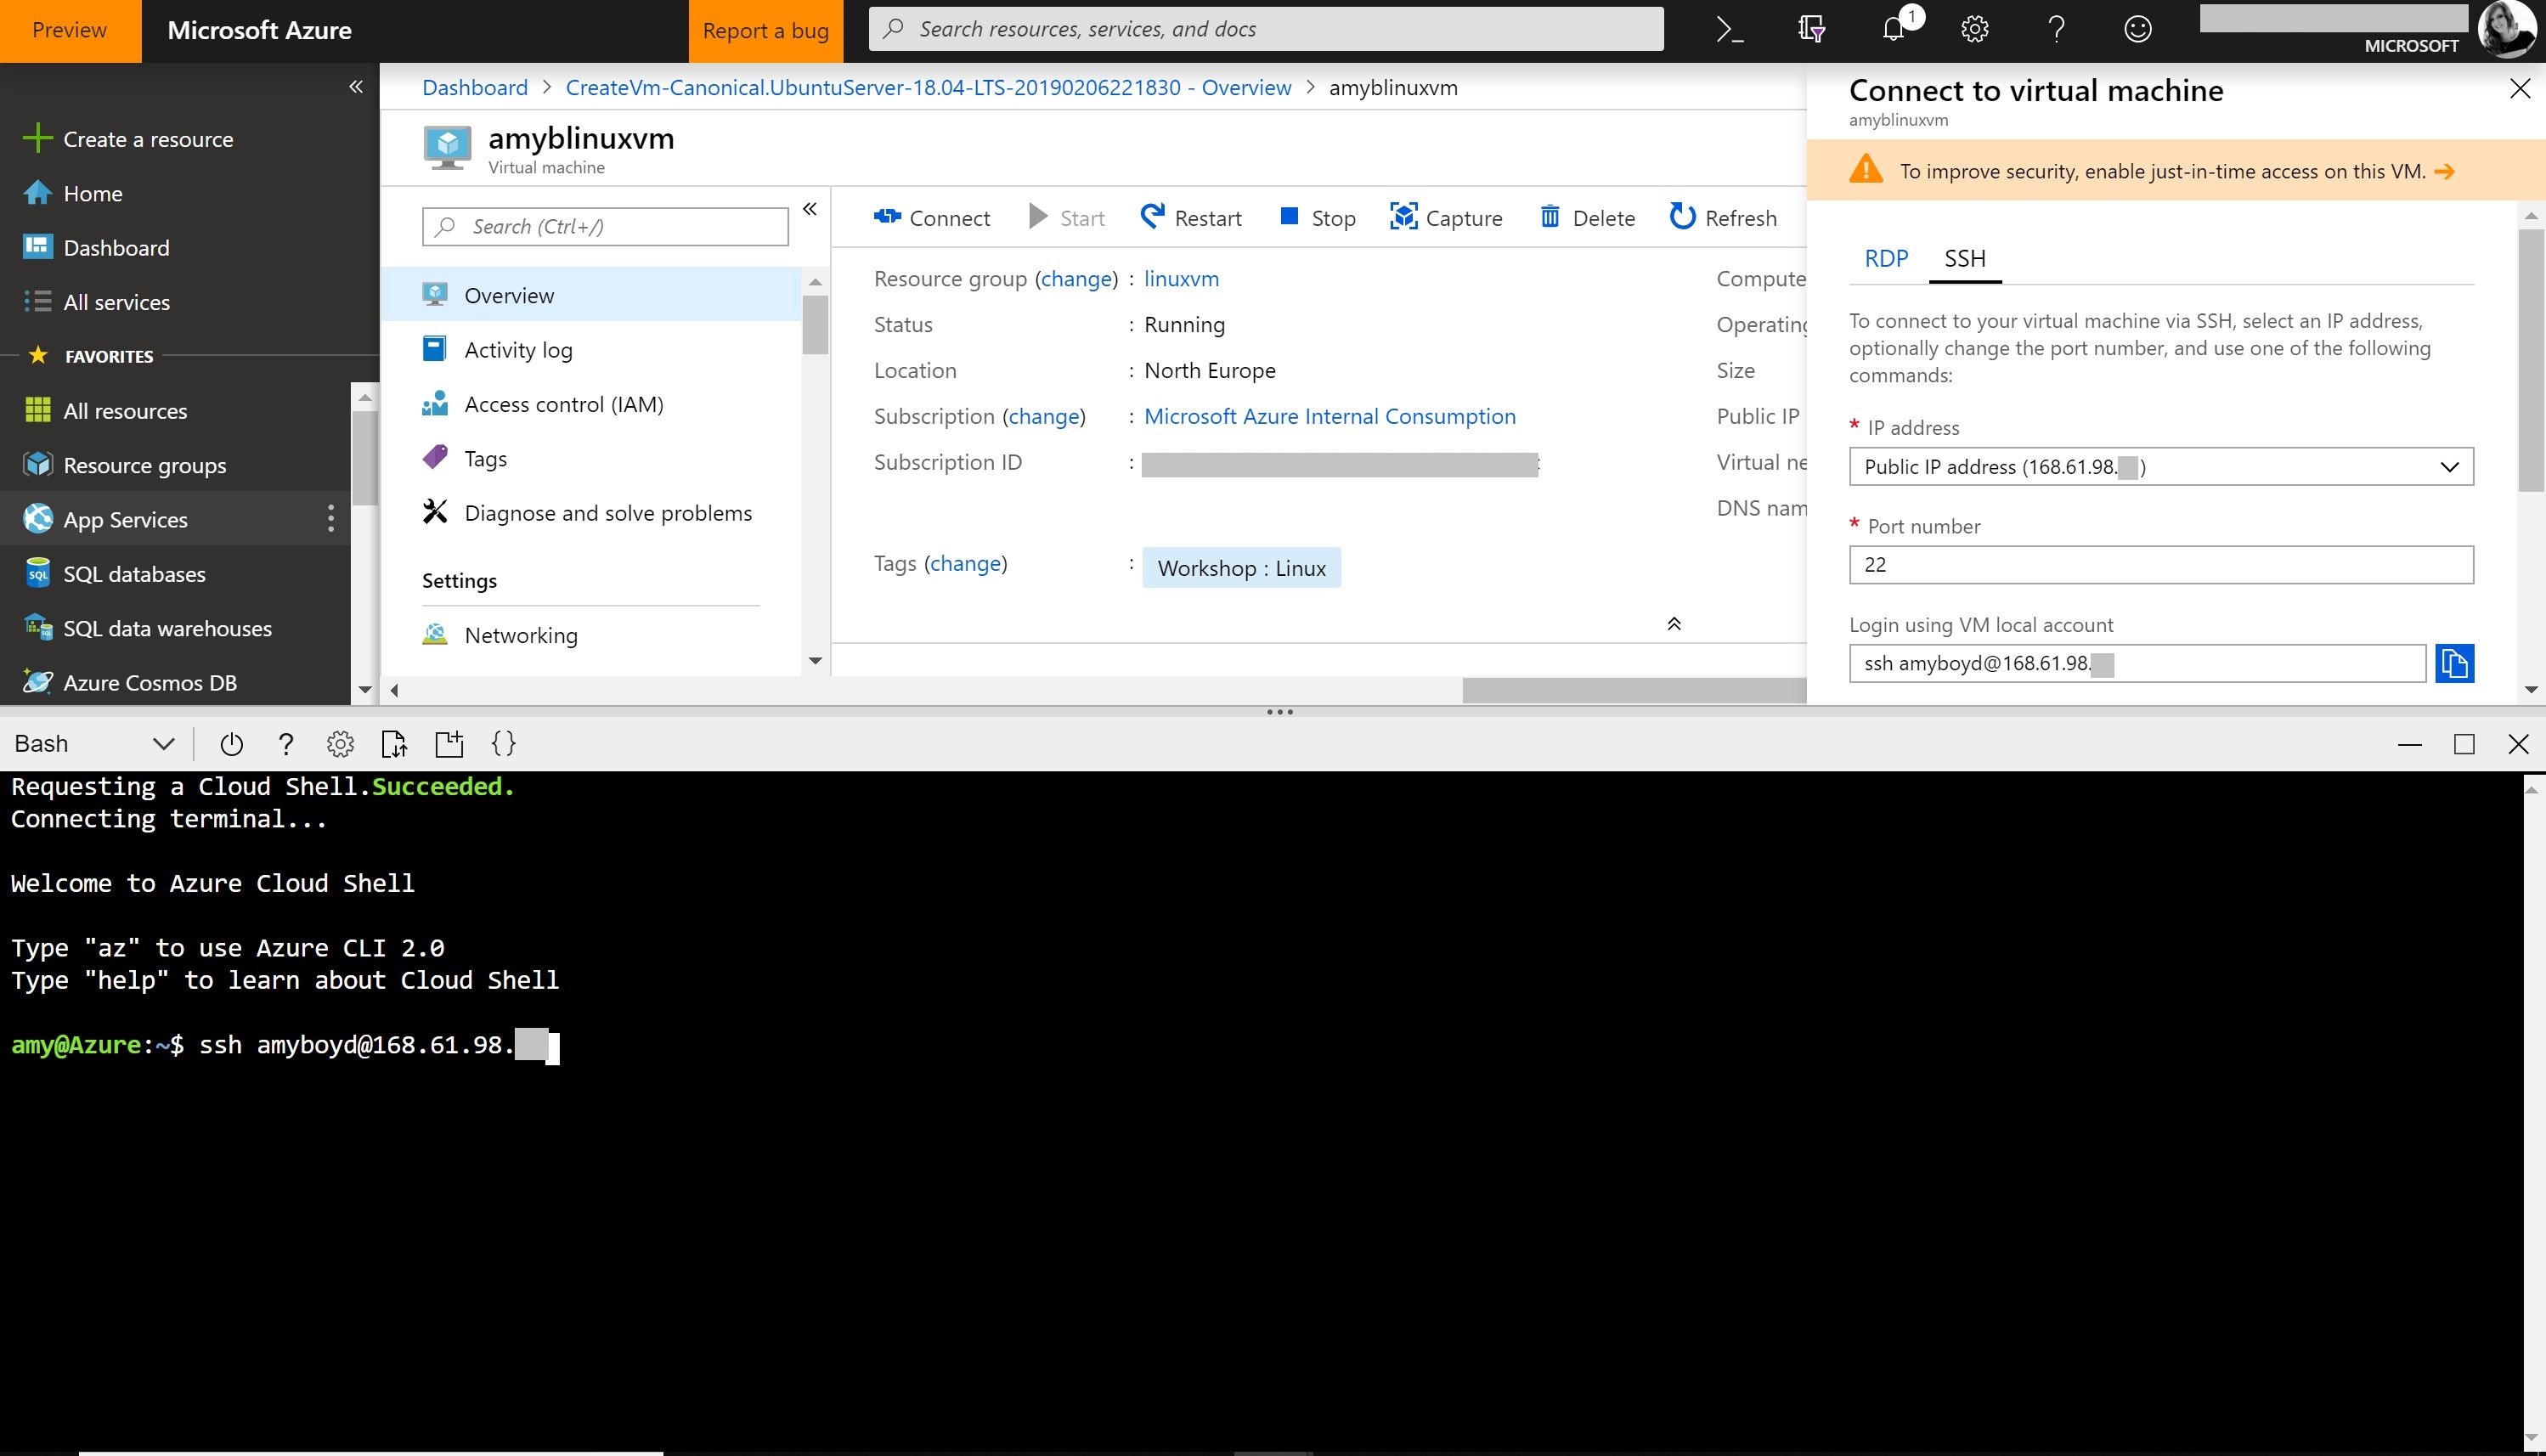
Open the Azure Shell again using the icon next to the top search bar.
Enter the ssh command which consists of:
ssh <vm-username>@<vm-ip-address>
hit enter, the command will connect you to the linux machine.
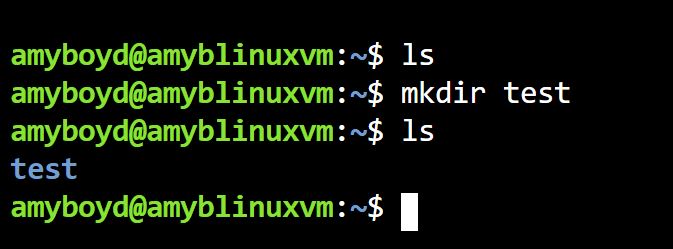
You can test you are connected using a simple command to create a folder on the system and view it:
- Initially use
lsto show no information - Now
mkdir test - Now run
lsagain to view the newly created folder
Find out more about running Linux VM’s on Azure here: Linux on Azure Documentation
